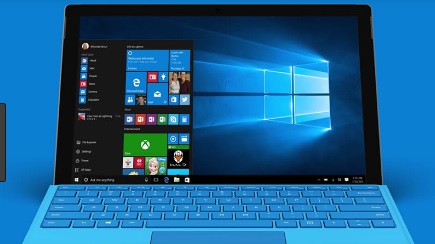
Windows 10 is the latest version of Windows that has won a large market share due to its responsiveness and most particularity, due to its recent upgrade (which we experienced some time back). Today, a majority of the PC users have upgraded their computers/laptops just to enjoy the recently added features and apps. Although the Windows 10 will give you everything you need to stay captivated, the issue of data loss due to malware attack, system crash or blue screen is very familiar. Therefore, to keep your crucial data safe and free from any possible loss, you need to schedule an automatic files backup in your PC on a daily, weekly or monthly basis.
Although there are many ways of backing up your data, Windows 10 has been designed with special backup and restore features that allows you to recover personal files and documents in case something goes wrong with your computer. Having said that, this guide will walk you through a step-by-step produce on how to backup your files automatically to another disk in Windows 10.
A step-by-step procedure on how to backup your files
Backing up files in Windows 10 is very easy thanks to the Backup and Restore feature. With such an inbuilt feature, you don’t have to worry about using other third-party software to accomplish this task. Now, before you can commence this procedure, the first thing you need to think of is which files need to be backed up. After that, you need to determine the backup destination (i.e. the primary hard disk or an external hard drive) and finally set the duration you wish the files to be backed up. With that in mind, let’s now go through the procedure.
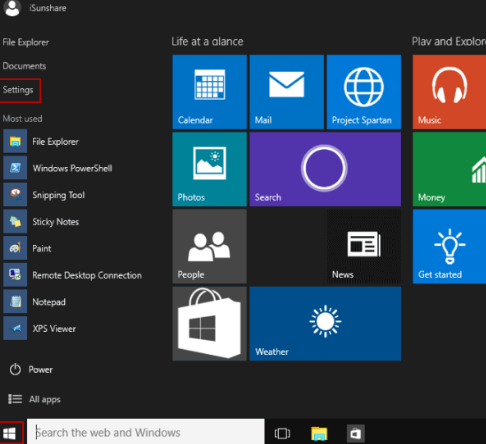
1. Start off by clicking the Start button
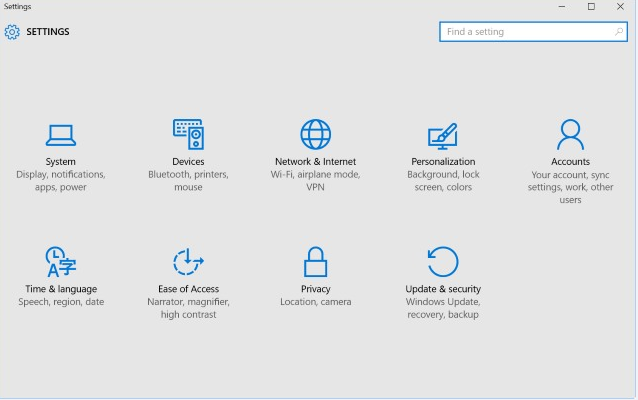
2. Click on Settings
3. Under settings, click on Update and Security
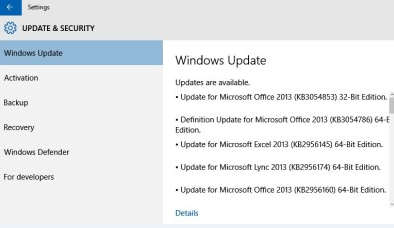
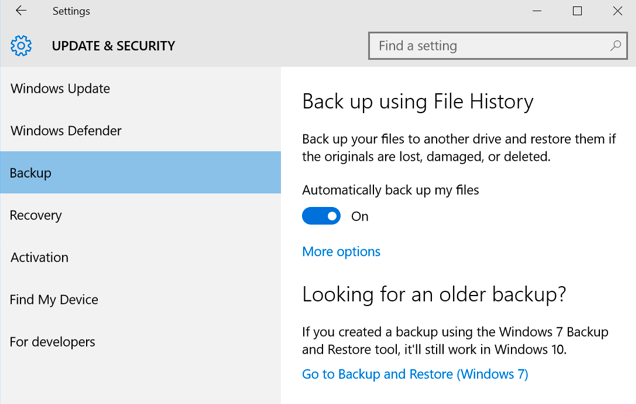
4. Under Update and Security, you’ll see a set of options on the top left of your window. Some of these options you’ll view include; Windows Update, Windows Defender, Backup, Recovery, Activation and For developers. Click on Backup and continue
5. Next, on the Backup option, there’s an ON/OFF option that lets you backup your files automatically.
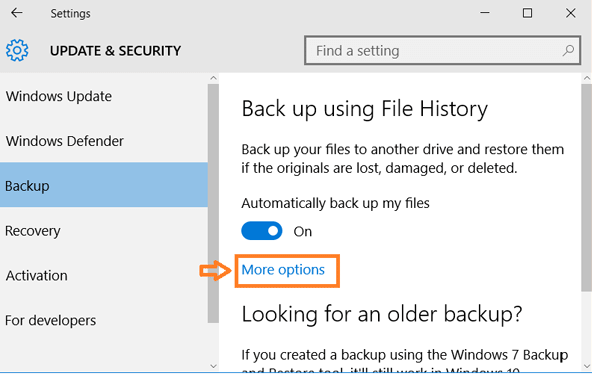
6. Click the More Options section located just below the ON/OFF button.
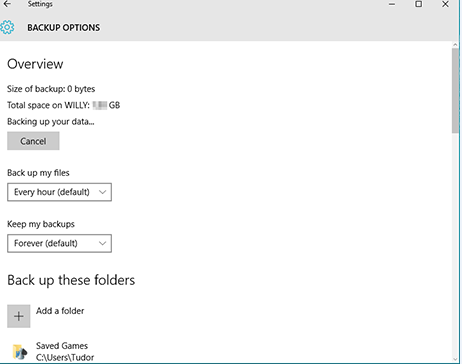
7. Here, you’ll find more options that will help you through the file backup process. To start, first check the Overview section at the top left of your screen to view the size of the files being backed up as well as the total space available on your hard disk.
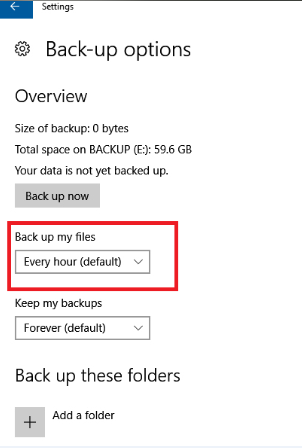
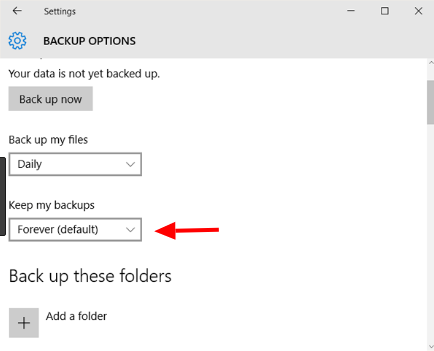
8. Next, click the Back up my files option box to set the backup frequency from the drop-down options. Here, you can set your Windows 10 PC to backup files every 15 minutes, 30 minutes, hourly or daily.
9. Next, click the Keep my Backups option to select how long you wish to keep the backups. Here, you can choose to backup your files daily, monthly or yearly.
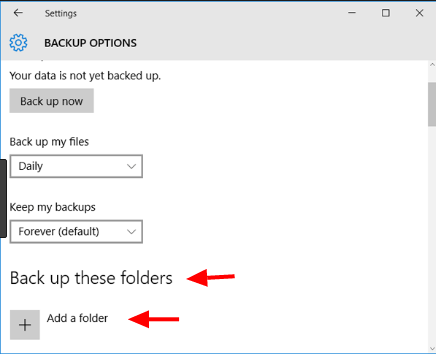
10. Below the Keep my Backups option box, there’s another option—Back up these Folders. Here, you can use the + sign under the Add a folder option to select the folders that contain files to be backed up.
11. Now that everything is set, select the external hard drive that you wish to backup your files into and click next.
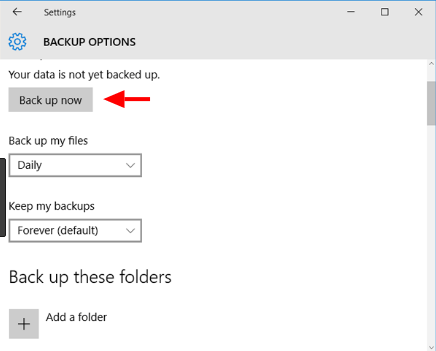
12. Finally, click the Back up Now option box at the top left corner of your screen.
13. The backup process will take some time. Just leave your PC to do its thing until the process is over (usually you’ll see a notification stating Backing up your Data).
Wrap up
That’s it. You’ve just backed up your data to another disk in Windows 10. Something else you need to know is that the backup information is usually displayed at the top left corner of your screen where you’ll see the current size of the backup, the date and the time when the last backup was scheduled.

