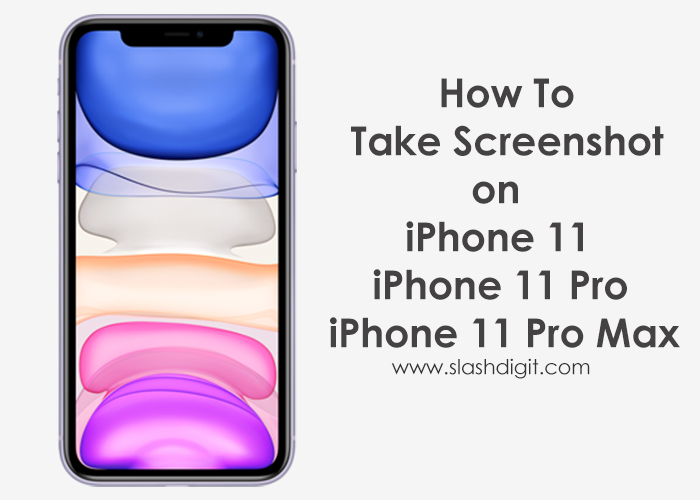
If you have recently upgraded from an older iPhone version to the new iPhone 11 series there are a number of things about your new phone that you’ll notice that are slightly different from the older one.
While it might take some time for you to notice some of these new changes, it important to know how to go about them. One of the most noticeable adjustments processes is taking a screenshot. In the previous models, you rely on the home button to take a screenshot.
However, things are little different now since the new iPhone 11, 11 pro and 11 pro max do not have a home button to turn to.
But don’t fret, the process is still simple. In this guide, we’ll show you how to easily take screenshots on your new iPhone 11. But before that, let’s learn a few things about screenshots.
What is a Screenshot?
A screenshot also called a screengrab, or a screencap is an image that shows the contents of your phone display. It allows you to capture exactly what your screen is showing either for future reference or to share with others.
Learning to make, save, and share screenshots is a skill that can be extremely helpful. Sometimes, it seems, screenshots are the most essential things on the internet. They are a new-age artifact.
It is a great way to prove to others that you read some crazy fact, and you are not making it up. These also make it easier for you to archive the past. It is also a great way to get an image from the internet that you cannot download.
How will I use a Screenshot?
Screenshots are almost as handy as they are revolutionary. They help you get more work done because, as they say, a picture is worth 1000 words.
For instance, when you want to share an image of a website’s content, a screenshot will be much faster than sending them the link and letting them sieve through all the pages for that one. It is also more comfortable than writing a long message.
Screenshots also help you to easily demonstrate what you are talking about. This means less time wastage and less confusion. With a screenshot, you will not have to state the same point again and again.
How to Take a Screenshot with your iPhone 11, 11 Pro and 11 Pro Max
The steps for making screenshots are easy to remember.
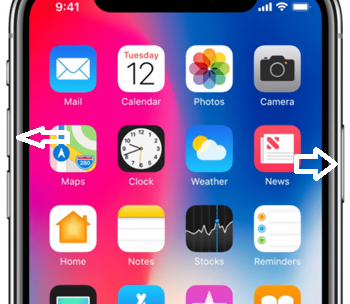
Step One: Press the Volume up Button and the Side/ Power Button
For you to take a screenshot with your iPhone 11, 11 pro or 11 pro max, hold both the volume up and the power button simultaneously for about a second. Once you let go of the buttons, a screenshot will have been taken.
Step Two: Editing the Screenshots
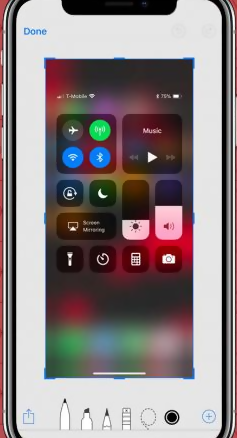
After the screenshot is taken, you will hear a shutter sound. The preview of the screenshot will be at the bottom of the screen. Once you tap on the screenshot, the image will display on the screen.
You will then see the option for editing the image. You can crop the image from here entirely. You can put your phone on mute if you do not want the shutter sound each time you take a screenshot.
Step three: Sharing screenshot
Tap and hold on to the screenshot so that you jump directly to the share sheet. This way you can share the screenshot through an app of your choosing. You can also dismiss the preview, and the shot will be saved in the albums in your photo app.
How to take the screenshot on your iPhone 11, 11 pro and iPhone 11 pro max with the Assistive feature
It is also possible for you to take the screenshot with just one hand instead of two. This is by using the assistive touch feature on your iPhone.
Step one: Enabling the Assistive Touch feature
To enable the assistive touch feature,
- Go to Settings >> choose General
- Go to Accessibility.
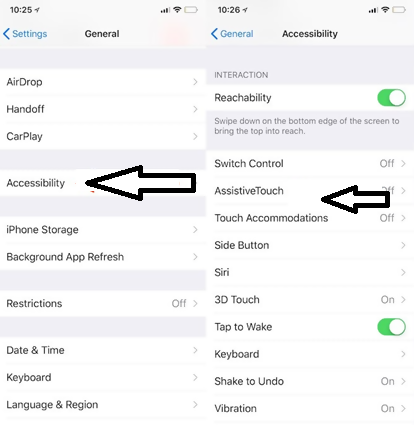
- Finally select the Assistive Touch option.
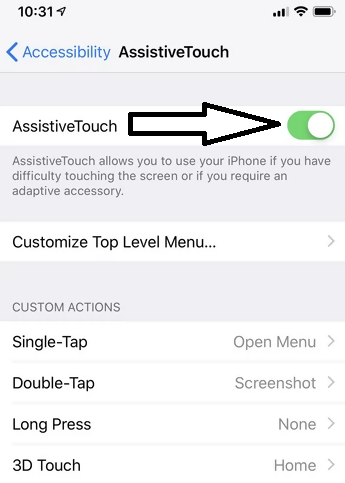
This will activate the assistive touch feature. There is a transparent button that has been added on the screen. With the assistive button taking screenshots and other functions will be easier to perform.
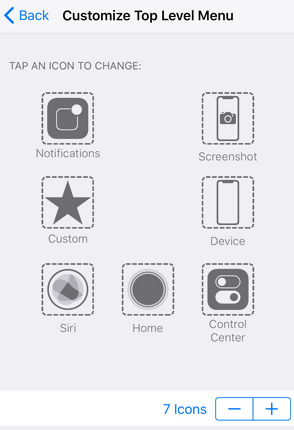
Step two: Select Customize-top level menu
You can tap on the customize-top level menu where you can choose a screenshot from the menu presented in the list. You may also want to replace the revert symbols using the screenshot button or other features that you need to use fast.
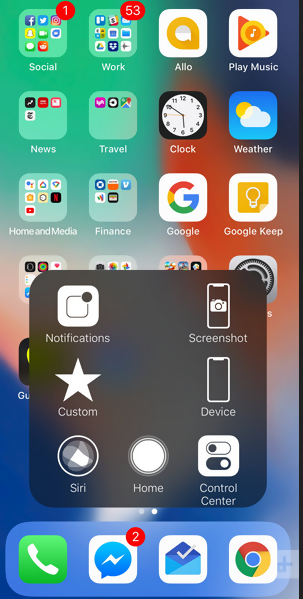
Step three: Take the screenshot with the assistive touch
With the screenshot option right there on the assistive touch menu, you can take a screenshot any time you want with just one button.
Conclusion
All the screenshots you take will be saved on the photos app just as with any pictures you take. Each will be added to the album automatically so there will be a screenshots album when you need to use or share the images. It’s as easy as that, we hope that this guide was helpful.