Smartphones often come packed with apps that are sheer nuisance. Why do we say that? Because, they just eat up space and we never use them. Sometimes, they just pop up without any notice and disrupt the work you do.
Bixby from Samsung is one such app that comes preinstalled on many Samsung phones including Galaxy S20, S20+ and S20 Ultra.
The question is, how do you disable the app? That is precisely what we will learn in this “how to” guide. It doesn’t matter whether you own a Galaxy S20 or S20+ or S20 Ultra. The method described here is same for all the three models.
But before we go ahead and describe a step-by-step guide, let us learn what Bixby is and why removing it is a wise option.
What is Bixby on Samsung Galaxy S20, S20+ and S20 Ultra?
Bixby is the voice assistant that was developed in-house by Samsung. Needless to say, Samsung intended it to be a direct competitor of Google Voice Assistant and Amazon’s Alexa or Siri on iPhones.
Though the attempts were noble from a business point of view, Bixby did not even manage to impress people! Instead of helping people, it became an annoyance.
Hit by the reality, Samsung gradually is rolling Bixby back into oblivion.
Why to Disable Bixby on Samsung Galaxy S20, S20+ and S20 Ultra?
Repeat! It has become an annoyance. However, Samsung refuses to roll out devices without Bixby. Instead, Samsung is generous enough to allow users to disable the app.
The problem with the app is that it is integrated into the common actions a user generally performs. For example, long pressing the side button doesn’t show the power menu. It will instead make Bixby pop up!
Do you really want that to happen? It is annoying to say the least!
How to Disable Bixby on the Samsung Galaxy S20, S20+ and S20 Ultra
Okay, now that we know what is Bixby and why to remove it, the more pressing question is, ‘how to remove it?’ Here is the guide you want and remember; it works on all three models in the exact same way! Follow the steps.
Remapping Double Press and Power Button
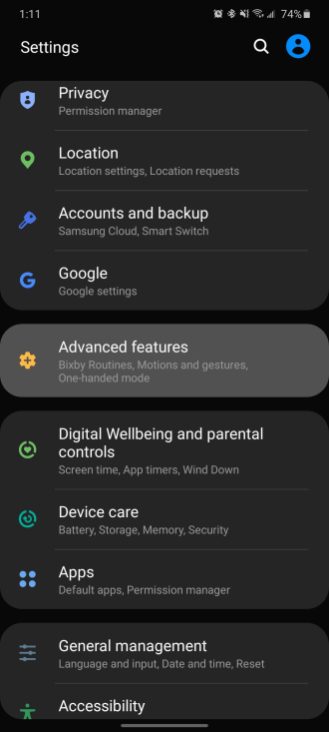
Step 1: Swipe down from the notification bar and pull out the notification drawer. Locate the ‘gear icon’ and tap on it.
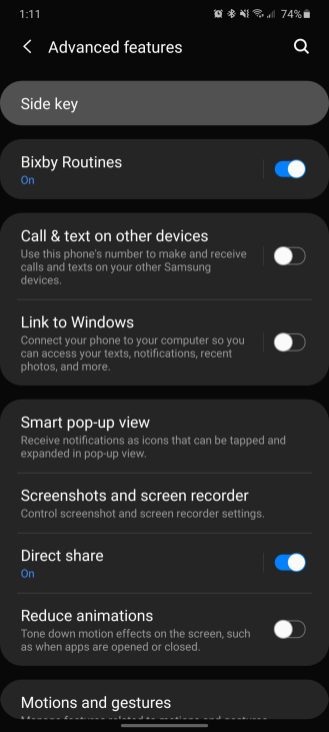
Step 2: In the settings page that opens, select the option which reads ‘Advanced Features.’ Then select ‘Side Key.’
Step 3: In the Side Key settings page, in the ‘Double Press’ segment, you can set ‘Quick Launch Camera’ to default instead of ‘Open Bixby.’ You can also select ‘Open App’ option and configure it to open any app you want on double pressing the power button.
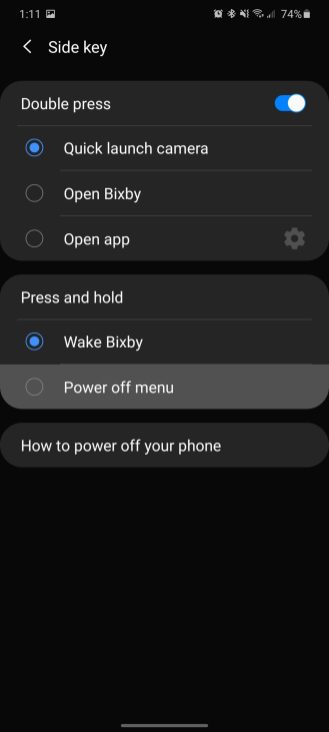
Step 4: In the ‘Press and Hold’ segment, the default selected is ‘Wake Bixby.’ Change it to ‘Power Off Menu.’
Step 5: Go one step back in ‘Advanced Features’ and toggle off the ‘Bixby Routines,’ which has been turned on by default.
That’s it! You have successfully remapped the buttons!
Turn off ‘Hi Bixby’ Wake-Up
In all likelihood, Samsung made you configure the hotword ‘Hi Bixby’ to wake up your phone through voice activation. If you don’t want that as well, here the steps that you need to follow:
Step 1: On the home screen of your phone, swipe up from the bottom. This will pull out the App drawer. Go to the Samsung folder where you can find Bixby.
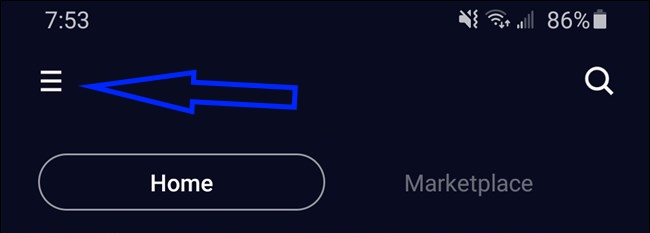
Step 2: Tap on Bixby app icon to pull up the app and now tap on the hamburger menu you see on the left top corner. It will open up an overlay menu.
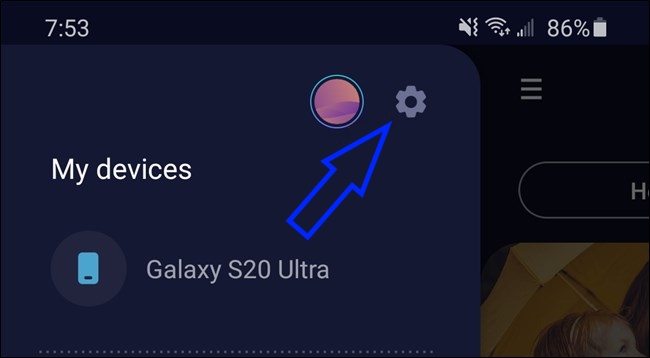
Step 3: Tap on the ‘gear’ icon you see in that overlay menu to open up Bixby Voice Settings menu.
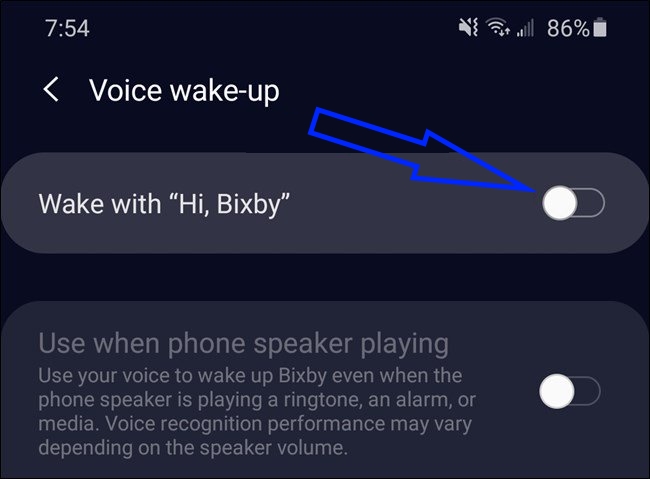
Step 4: Tap on the option which reads ‘Voice Wake-Up.’ This will pull out the voice command menu.

Step 5: Toggle off the ‘Wake With Hi, Bixby’ option.
That’s all! You have successfully deactivate Bixby on your phone.
Until you manually open the Bixby app, it is not going to bother you. You cannot however remove the app completely because it is a system app. Doing so will require a rooted device. You really don’t want to mess with the phone’s warranty and neither do you want it to get bricked, do you? Avoid doing that!