Smartphones have made our lives more convenient and easy by enabling us to keep in touch with our family, friends and acquaintances. With just one click or a touch, you can connect with anyone from anywhere in the world as long as you have the contact number of that person in your phone’s address book. But there are times when you might accidentally delete someone from your address book or your device got crashed and all your contacts are lost. The situation is aggravated if you have no other alternative modes to contact them. What would you do in such scenario? Well, you can’t do anything about it unless you have made a backup of your contacts somewhere that you could refer to.
In order that you make contingency plan for such situations, we bring you this guide to teach you 5 different ways to backup your iPhone contacts so that they are always available when you need them. Even if you lose them from your phone, you can always recover from the backups.
Now, there are many different ways you could use to backup your iPhone contacts. We’ll cover each method one by one. You could use any method that best suites your needs.
So, without further ado, let’s get started.
Method 1: How to Backup iPhone Contacts to iTunes
With iTunes, it is very easy to backup iPhone contacts and other data to your Mac or PC. All you need is the latest version of iTunes software installed on your computer.
Steps to backup iPhone contacts with iTunes:
- Step 1: Launch iTunes on your computer.
- Step 2: Now connect your iPhone to your computer through a USB cable.
- Step 3: iTunes will automatically detect your device and show the device on the top left panel.
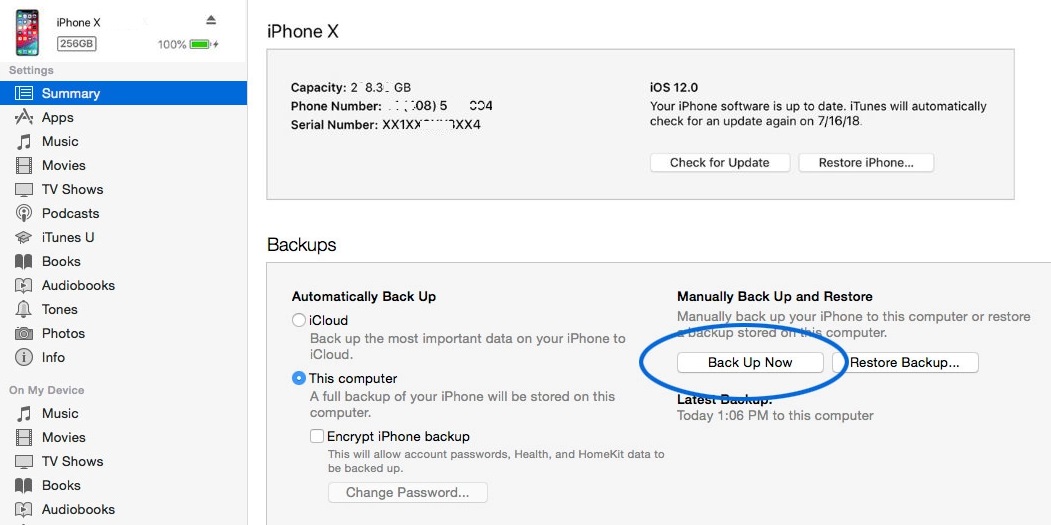
- Step 4: Click on your device and choose “Back Up Now” from the Backups panel. You can choose whether to backup your iPhone data on iCloud or store on your computer.
- Step 5: iTunes will run for a while and backup all your data including your contacts to your computer or iCloud based on your selection in the above step.
Method 2: How to Backup iPhone Contacts to iCloud
iTunes allow you to backup your data to iCloud as well. As explained in the above method, you can choose to backup your data to iCloud by selecting the option “iCloud” and clicking “Back Up Now” button.
Here, we’ll show you how to backup your iPhone data including your contacts to iCloud directly from your iPhone device.
Steps to backup iPhone Contacts to iCloud:
- Step 1: Ensure your device is connected to Wi-Fi. You can perform the backup on your 3G/4G network as well but if data on your device is large, we recommend Wi-Fi instead as that’ll save on your carrier data.
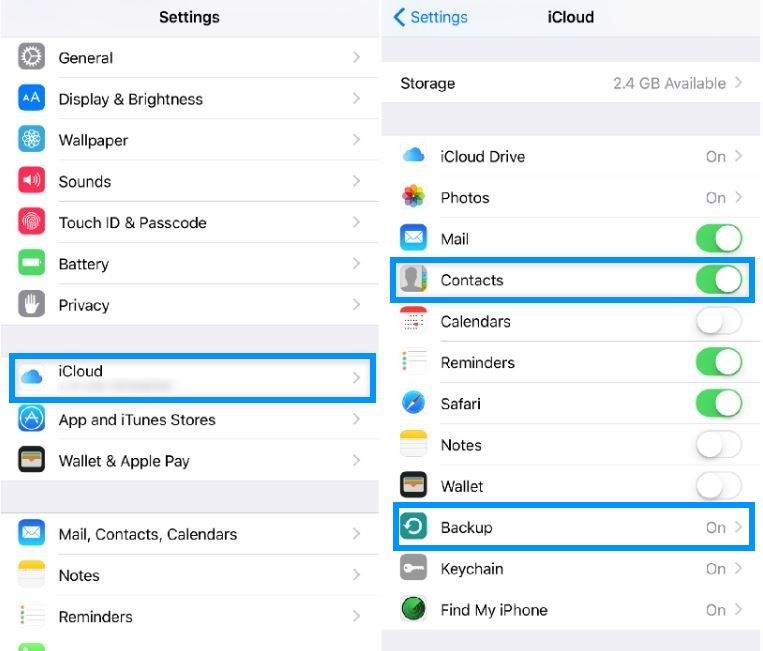
- Step 2: Navigate to Settings on your iPhone and tap iCloud.
- Step 3: Check if iCloud Backup for your Contacts is enabled on your device. You need to have this option enabled to backup your iPhone contacts data to iCloud. To enable this, push the Contacts slider to the right.
- Step 4: Next click on Backup and toggle iCloud Backup to On if it is not already enabled.
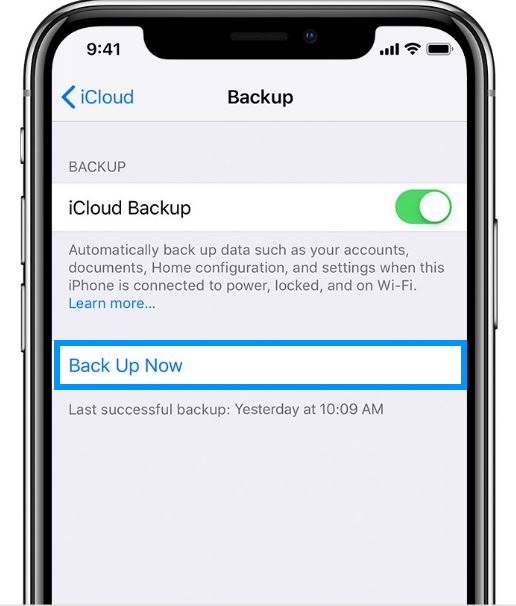
- Step 5: Tap Back Up Now button to begin the backup process.
Method 3: How to Backup iPhone Contacts Without iTunes or iCloud
If you’re looking for ways to transfer your iPhone contacts to your Computer and back to iPhone without using iTunes or iCloud, then we recommend you to follow this method. We’ll show you how to backup your iPhone contacts using two utilities namely CopyTrans Contacts and EaseUS MobiMover Free.
First we’ll show you the steps to backup your iPhone contacts to your computer using Copytrans Contacts software. Currently, CopyTrans Contact supports Windows PC only. Mac version is not available at the moment.
Steps to backup iPhone contacts to PC without iTunes or iCloud using CopyTrans Contact:
- Step 1: Download and install Copytrans Contacts software on your Windows PC.
- Step 2: Launch the software and connect your iPhone to your computer.
- Step 3: The program will detect your device and list all the contacts from your device as shown below.
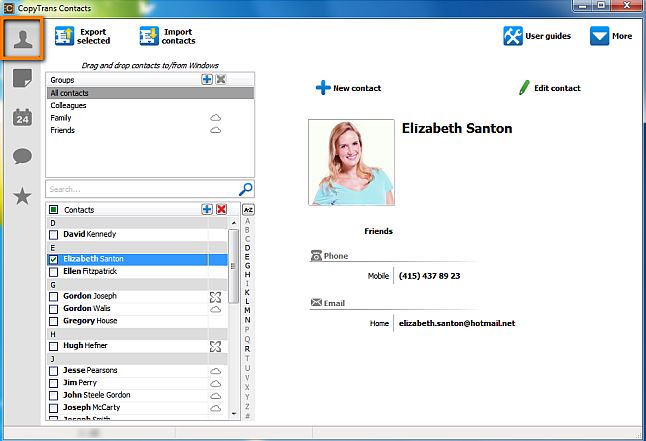
- Step 4: Select all the contacts you want to transfer to your PC and click “Export selected“. Press Ctrl+A to select all contacts at once.

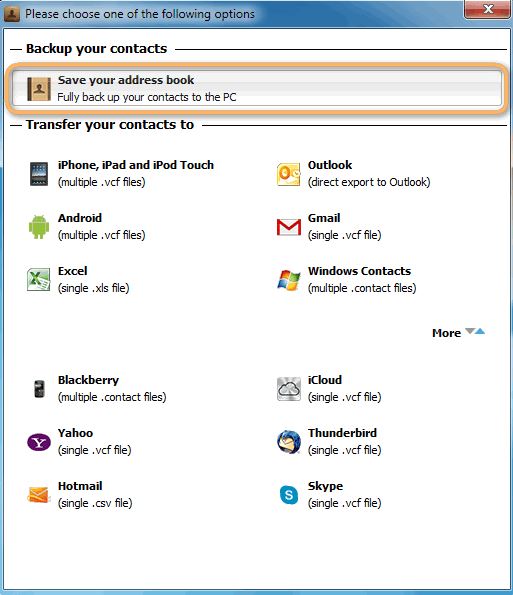
- Step 5: You’ll be prompted with a new window to choose the options as to where to save your exported contacts. Select “Save your address book” to save your contacts to your PC.
- Step 6: Next, choose the location on your PC to save the exported contacts. Your exported contacts will be saved at the specified location as *.vcf (vCard) contact files. You can use these files to copy the contacts back to your iPhone or another device using the same tool or another tool that supports .vcf standard files.
You can also use EaseUS MobiMover, a free tool to backup your contacts without using iTunes or iCloud.
Steps to transfer contacts from iPhone to Computer without iTunes or iCloud using EaseUS MobiMover:
- Step 1: Download and install EaseUS MobiMover Free tool on your PC or Mac.
- Step 2: Connect your iPhone to your computer using a USB cable and launch EaseUS MobiMover program.
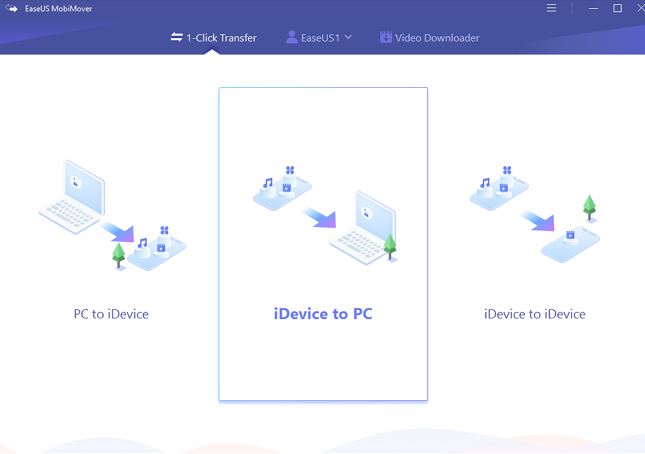
- Step 3: Next, choose iDevice to PC (on Windows computer) or iDevice to Mac (on Mac computer).
- Step 4: In the proceeding window, click More and ensure Contacts is selected. You can also backup other data such as Photos, Audio, Video and more. Select the data type you want to backup. Once the selection is done, choose the location where you want to save the backup.
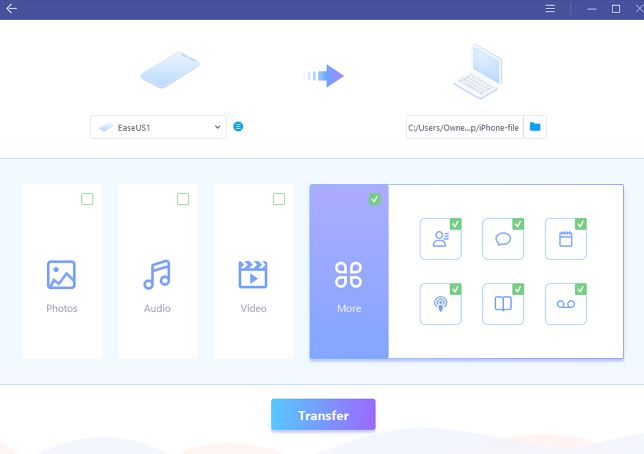
- Step 5: Now click “Transfer” to begin the transfer process. The contacts will be saved to your chosen location in html format. You can use the exported file to copy the contacts back to your phone.
Method 4: How to Backup iPhone Contacts to Gmail/Google Drive
In case you’re looking to backup your iPhone contacts to your Gmail or Google Drive account, then this guide will help you do exactly that.
Steps to Backup/Transfer iPhone contacts to Gmail without iCloud:
- Step 1: Open your iPhone’s setting app.
- Step 2: Tap Passwords & Accounts, then tap Add Account.
- Step 3: Choose Google from the option.
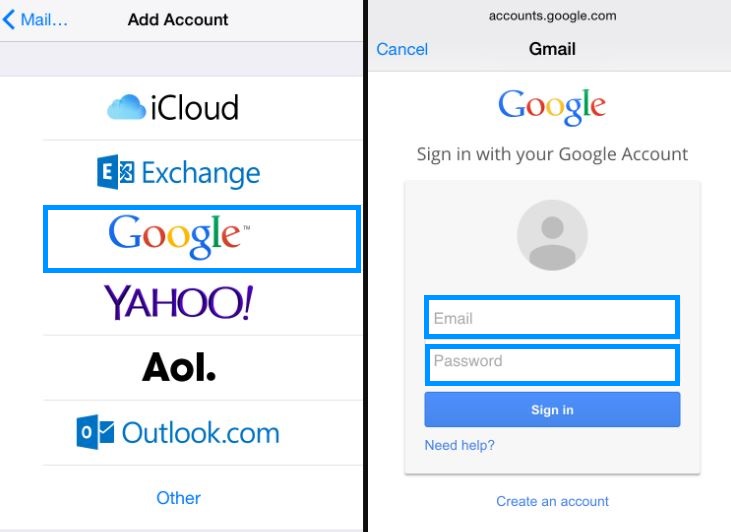
- Step 4: Enter your Gmail username and password and tap Sign In.
- Step 5: Under Gmail setting, choose Contacts and toggle it On.
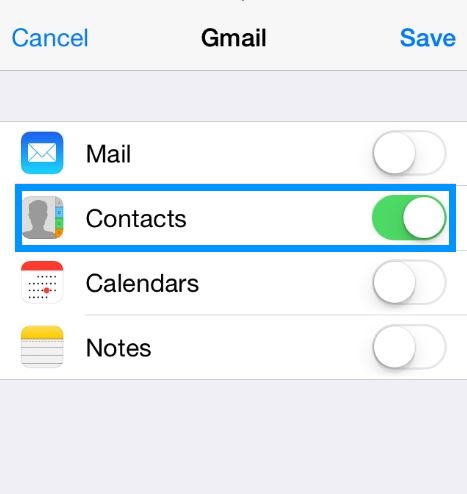
- Step 6: Tap “Save” at the top right.
- Step 7: Your iPhone contacts will now be synced to your gmail account.
Steps to Backup iPhone Contacts to Gmail with iCloud:
- Step 1: Go to “Settings” > [your name] > “iCloud” and then turn the “Contacts” slider On.
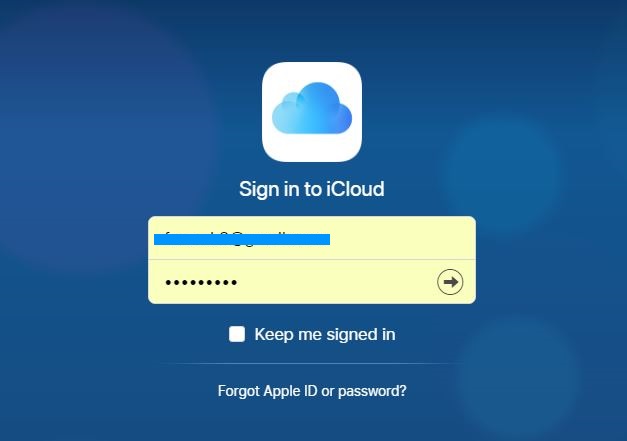
- Step 2: Next, login to iCloud.com using your Apple ID and Password.
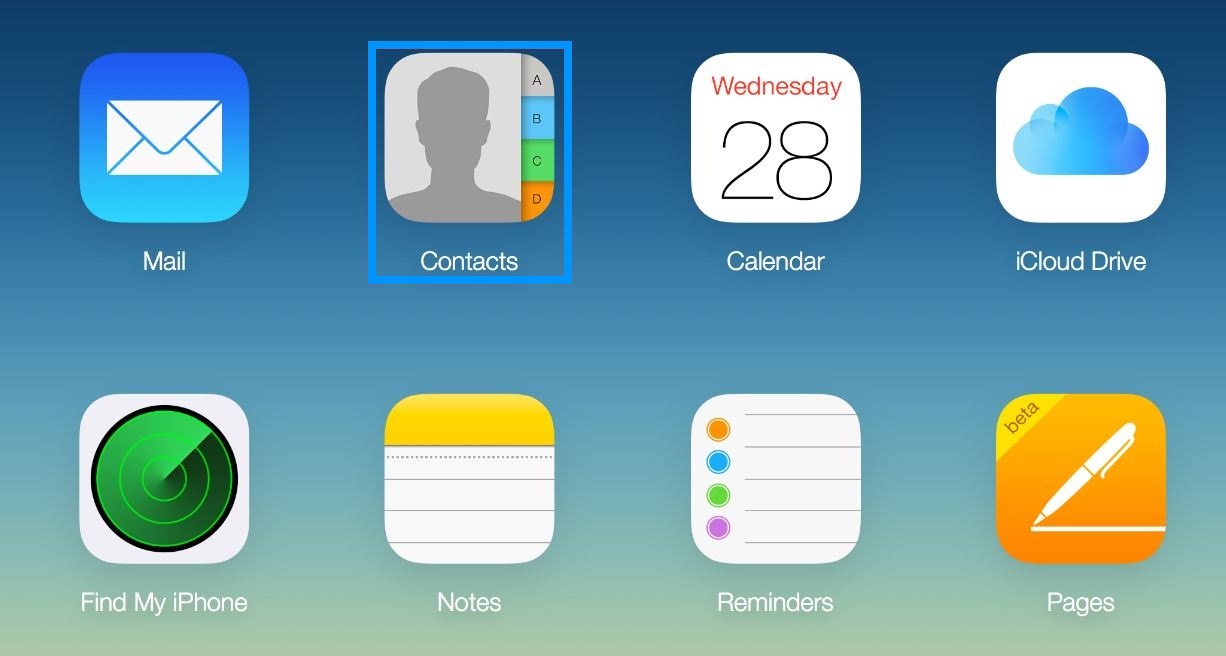
- Step 3: Choose “Contacts” from the available options.
- Step 4: Choose the contacts you want to export and tap the Gear icon at the bottom left corner and select “Export vCard“. You can select all contacts by pressing Ctrl+A (on Windows) or Cmd+A (on Mac).
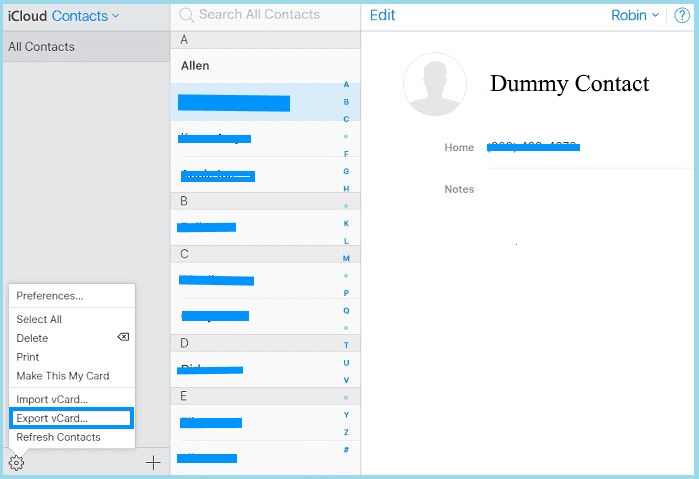
- Step 5: Save the exported file to your computer.
- Step 6: Next, sign into Google Contacts and click “Import” in the left panel. This will open a dialog box as shown below.
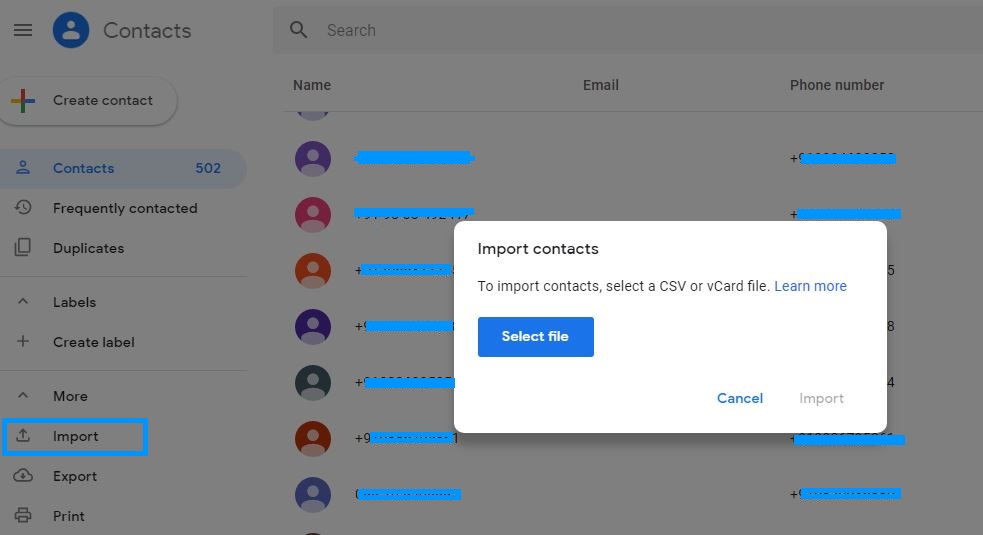
- Step 7: Click “Select file” and choose the vCard file you exported from iCloud in the previous step.
- Step 8: Click Import to start importing your contacts to your Gmail Contacts. The uploaded contacts will be synced to your Gmail account and available across all devices for the account.
Backup iPhone contacts to Google Drive:
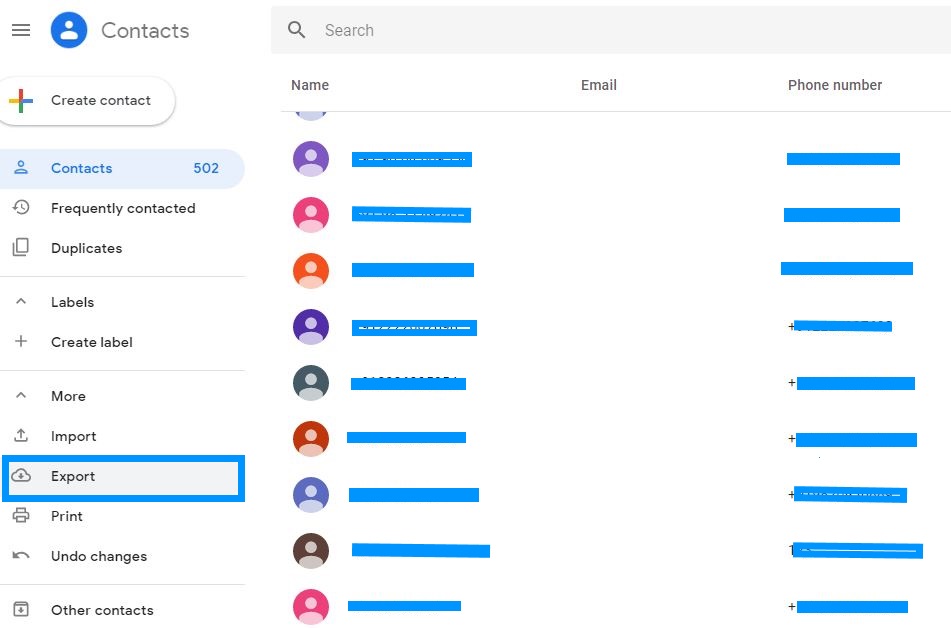
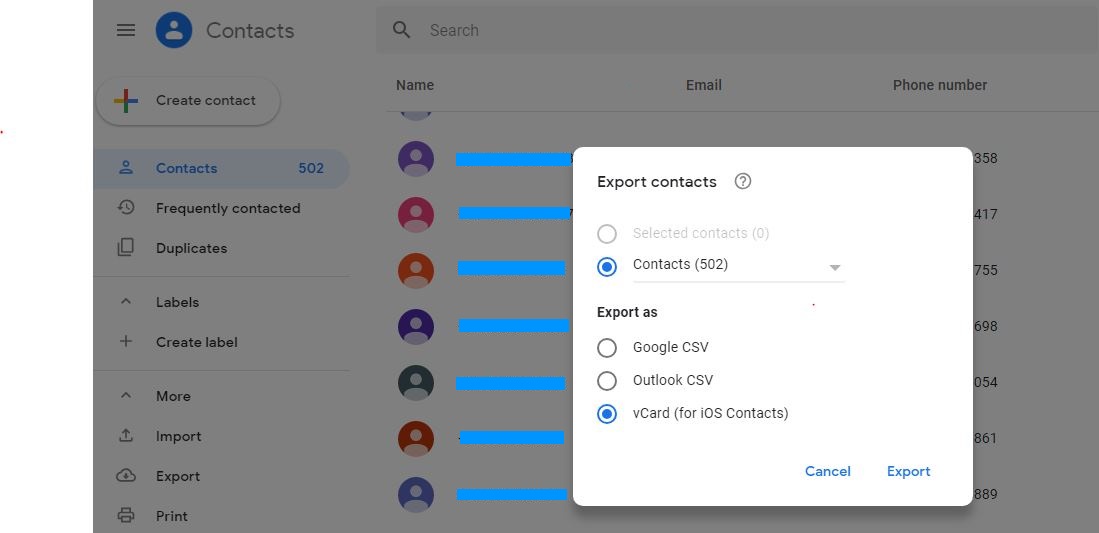
After you have synced your iPhone contacts to your gmail account, all your iPhone contacts will be available on Google Contacts. From Google Contacts page, you can export your contacts to your computer in CSV or as a vCard file. You can skip this and instead use the vCard file you exported from your iCloud account in the previous steps.
Once you have downloaded the vCard contacts file, you can upload it to your Google Drive or any other cloud service that you use. You can also upload it to Dropbox, OneDrive, iCloud and so on. The contacts will remain in the cloud as a backup file and you can use whenever you need them.
Method 5: How to Backup/Copy iPhone Contacts to SIM Card
Well, you need to know that it is not directly possible to backup your iPhone contacts to SIM because iPhone does not support saving data to SIM card by default. However, you can use indirect methods to achieve the same result. There are many different ways to copy iPhone contacts to SIM card. You can either use third-party SIM manager tools that usually require additional hardware plus professional support or if you want to go the easy route, export the contacts you want to copy to SIM from your iPhone to a computer or cloud as a vCard file through the methods we explained above. You can then import or download this file from your computer or cloud to an Android device. Since Android device allows copying contacts to SIM, once the contacts are imported to your Android address book, you can then copy that to your SIM.
Here, we’ll show you how do copy and save contacts from iPhone to SIM card through an intermediate Android device. Once your iPhone contacts are transferred to an Android device; from the Android device, you can then export/copy the contacts to your desired SIM card.
Steps to transfer iPhone contacts to Android device:
- Step 1: Follow the steps to export iPhone contacts as a vCard file to your computer or cloud as discussed in Method 4.
- Step 2: Copy the vCard file from your computer to your Android device or alternatively, download it to your Android device from the cloud backup.
- Step 3: Take out the SIM from your iPhone and insert in to your Android phone.
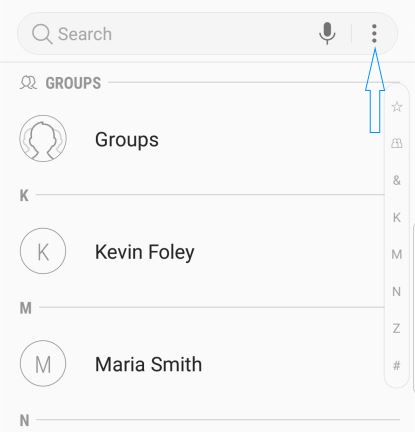
- Step 4: Now go to Contacts app on your Android device and click the 3 dots on the top right corner.
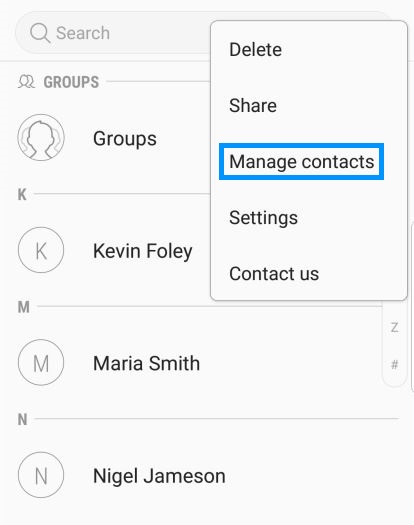
- Step 5: From the drop down menu, select “Manage contacts“.
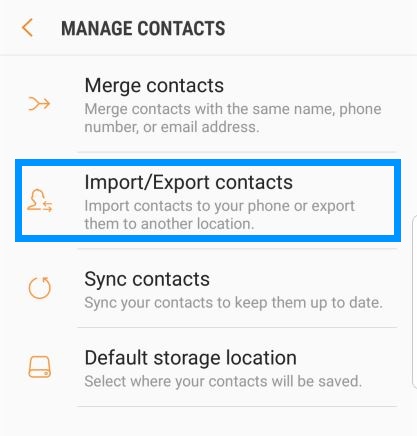
- Step 8: Tap “Import/Export contacts” in Manage contacts screen.
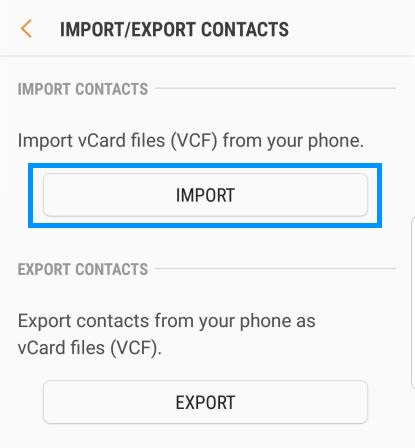
- Step 9: Click “Import” on the next screen.
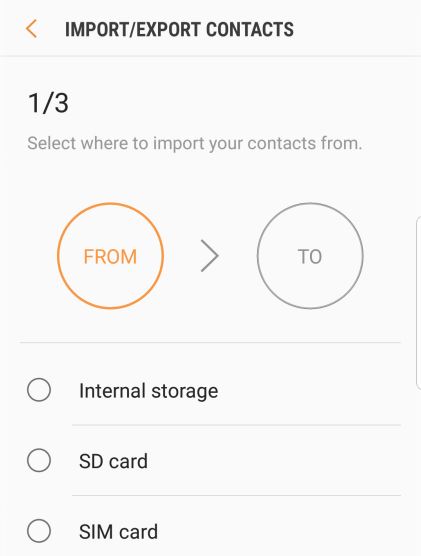
- Step 10: Next, select the option from where you want to import the contacts from. Choose Internal storage if you have saved the downloaded vCard file in internal memory or else choose SD card if it is stored in external card.
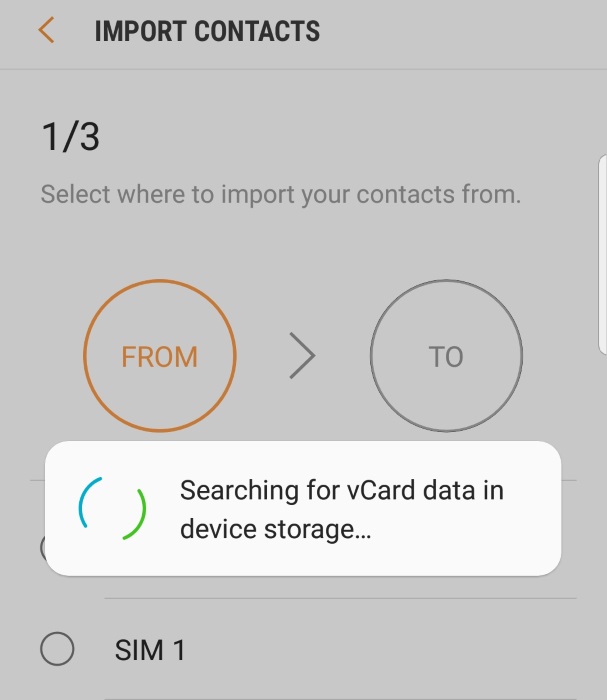
- Step 11: This will initiate a search for the vCard file in your device storage.
- Step 12: Once the file is found and selected, you’ll be asked where to save the contacts.
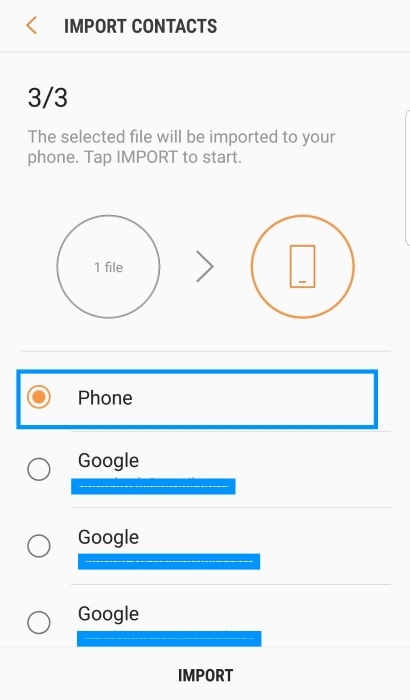
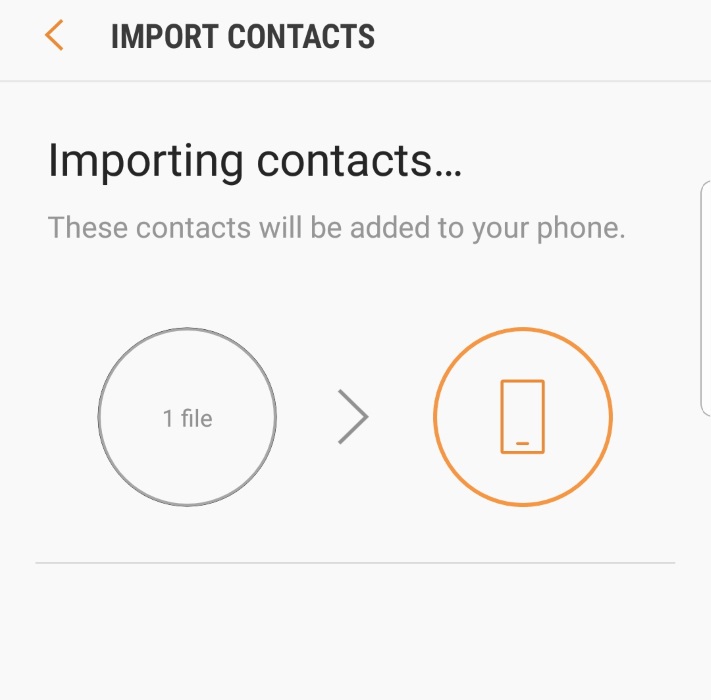
- Step 13: Choose “Phone” and click “Import” to save the contacts in your phone’s address book. The process will run for a while depending on the size of your contacts.
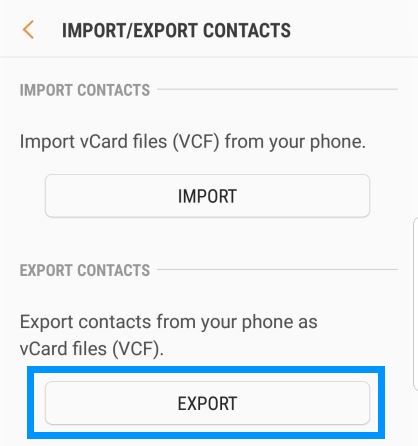
- Step 14: Once the import process completes, go back to “Manage contacts” screen and tap on “Import/Export contacts“ screen again.
- Step 14: This time select “Export“.
- Step 15: Next, select where you want to copy the just imported contacts to your phone address book.
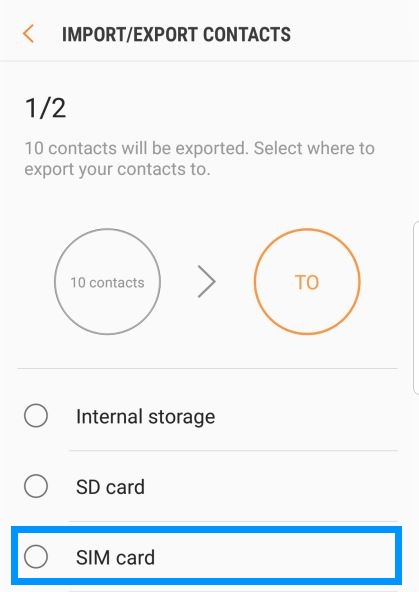
- Step 16: Choose “SIM card” to copy contacts from phone memory to SIM card.
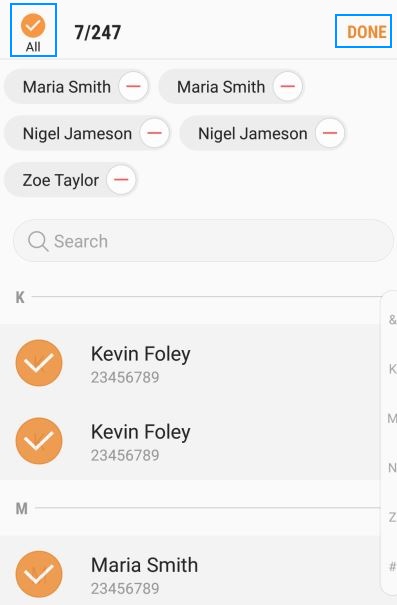
- Step 17: Next, check All on the top left corner to select all contacts at once. Once done, click “Done” on the top right corner.
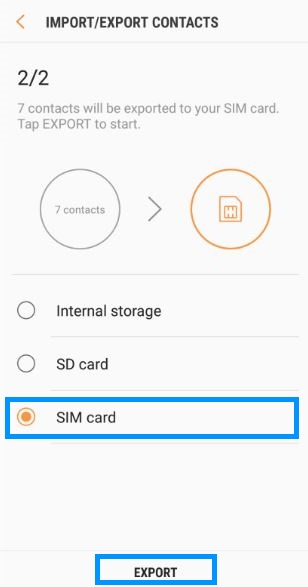
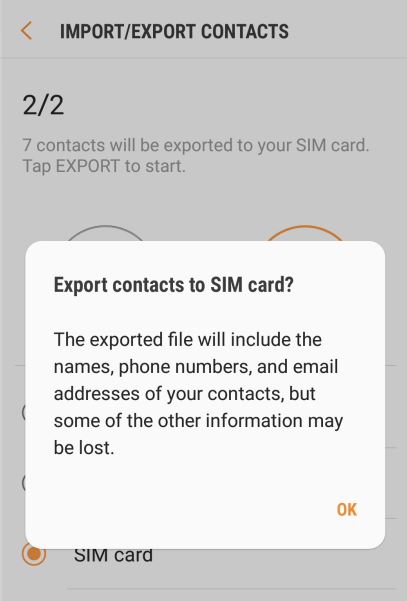
- Step 18: On the next screen, select SIM card and click “Export”.
- Step 19: Click “OK” to confirm the action on the popup window. Your contacts is now exported to your SIM card.
- Step 20: Take out the SIM card from your Android phone and insert it back to your iPhone. You can then import contacts from the SIM to your iPhone from the phone’s setting.
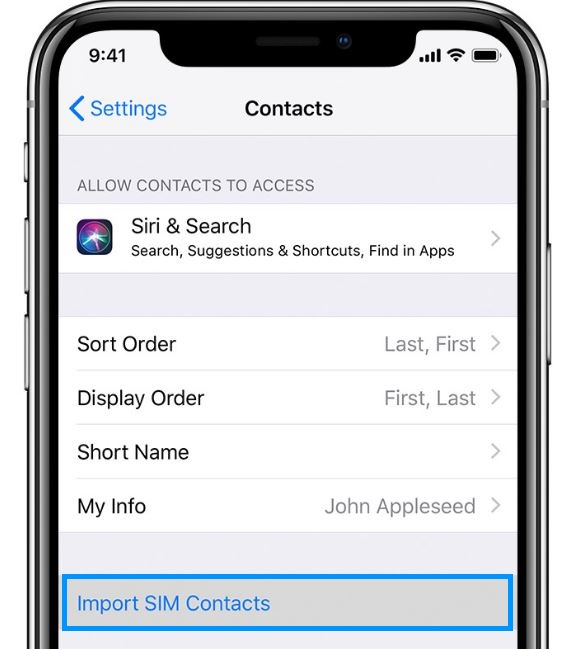
- Step 21: To import contacts from SIM to iPhone, go to Settings > Contacts and click “Import SIM Contacts“.
- Step 22: Once the import is completed, go to your Contacts app and make sure the contacts have been successfully imported.
So that’s all it takes to backup your iPhone contacts. Hope this guide has been of help to you!