This is more like a life-hack or a life saving technique to helping or aiding communication. On some days when you need to communicate with your client or a loved one using the webcam and your laptop or PC does not have one, what will you do?
You don’t have to wreck your nervous system or break a bank trying to get a remote camera, instead read this article to the end. In this article, you will find a simple guide to using your smartphone as your webcam using IP Webcam.
Using your phone as your webcam can’t be more leisurely. This process transfers the video from your phone to a specific port on your PC and PC driver software to record it and send it as webcam video to any application that needs access to the webcam.
When the need for a webcam comes and you don’t have a remote camera, IP Webcam comes as the perfect substitute, a mobile way of connecting to the world. And guess what? You do not have to crack a box of codes before you turn your phone into a webcam you can use to talk to both your clients and loved ones. It’s so effortless. In this article, you will see how to configure your phone into a webcam using the IP Webcam app.
Step by Step Guide to using your Android Phone as a Webcam with IP Webcam
Here the video of your phone is transmitted and is available for your PC applications via WiFi using IP Webcam. This is the most comfortable and most flexible way to do this.
Prerequisite
Your computer and your Android phone must be connected to the same network when Android is connected via WiFi. This means that you:
- Connect your phone and computer to the Internet through a wireless router.
- Alternatively, connect your Android to the Internet through the virtual router (Windows 7 only)
- Alternatively, connect your Android to the PC through a shared Wi-Fi network (you need a rooted phone with ad-hoc networks enabled).
If your phone is connected to the same PC network via Wi-Fi, follow these steps:
- Step 1: Download the IP Webcam App from the Google Play Store.
- Step 2: Install the app on your Android smartphone.
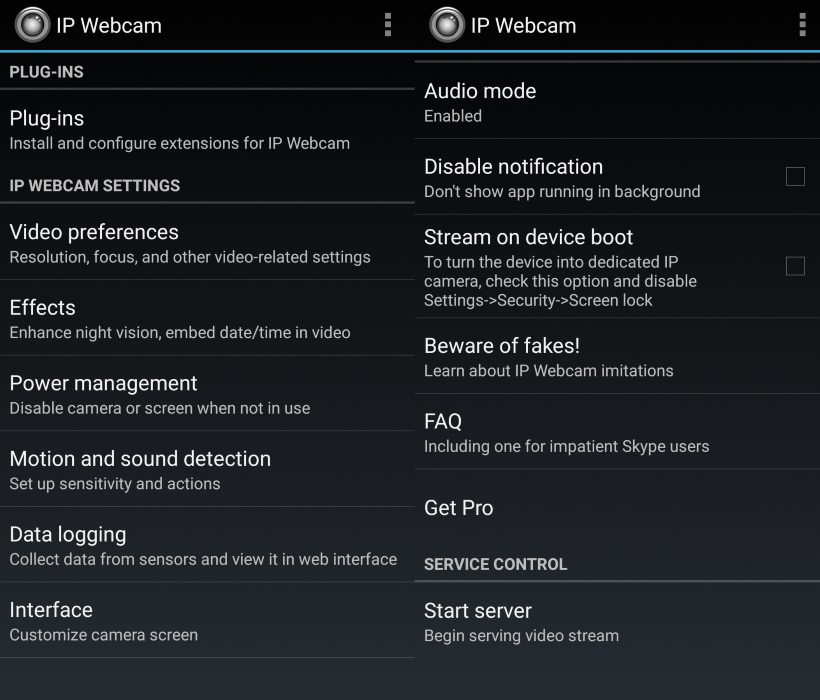
- Step 3: Compared to most applications you’ve found, it works with a single interface. The first screen is essentially the configuration page where you can configure all configurations of your webcam. The configuration options offered here are numerous.
- Step 4: Scroll to the bottom of the page and you will see the option “Start server“. Tap and wait for the webcam server, which you can access from your browser on your laptop or computer, to start.
- Step 5: As soon as you start the server, it immediately starts to transfer the data from the camera of your device. IP Webcam will now open your camera and start transmitting the video to a specific IP address and port.
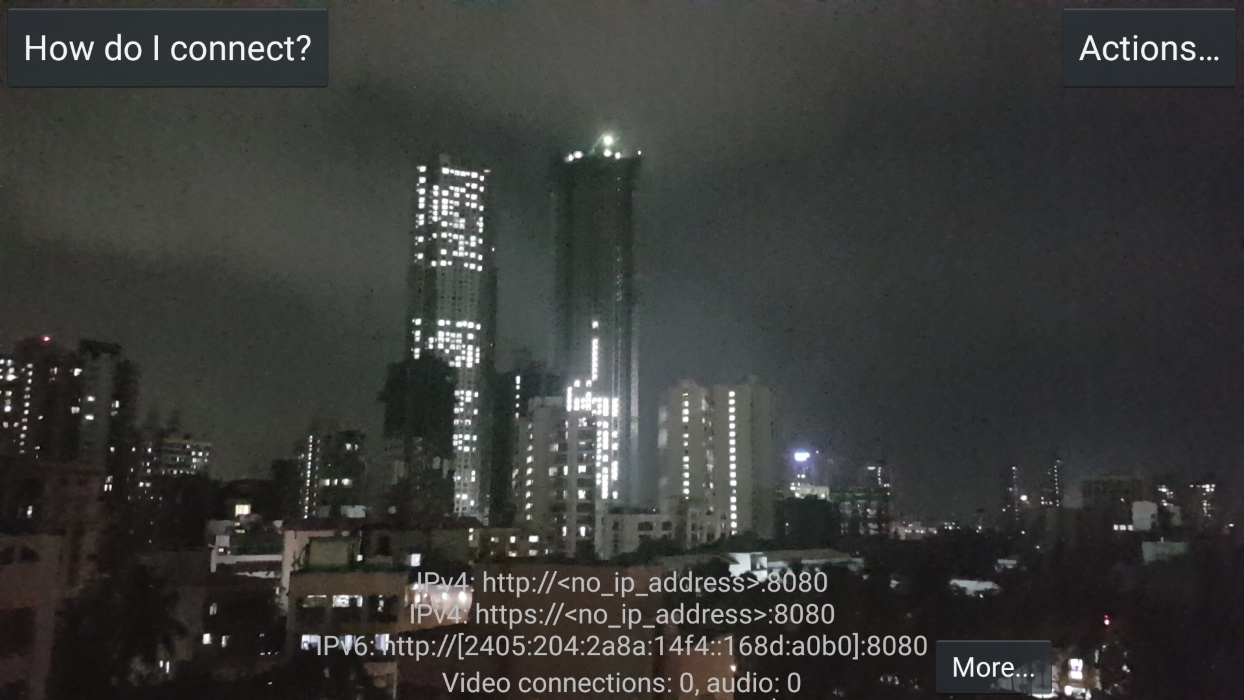
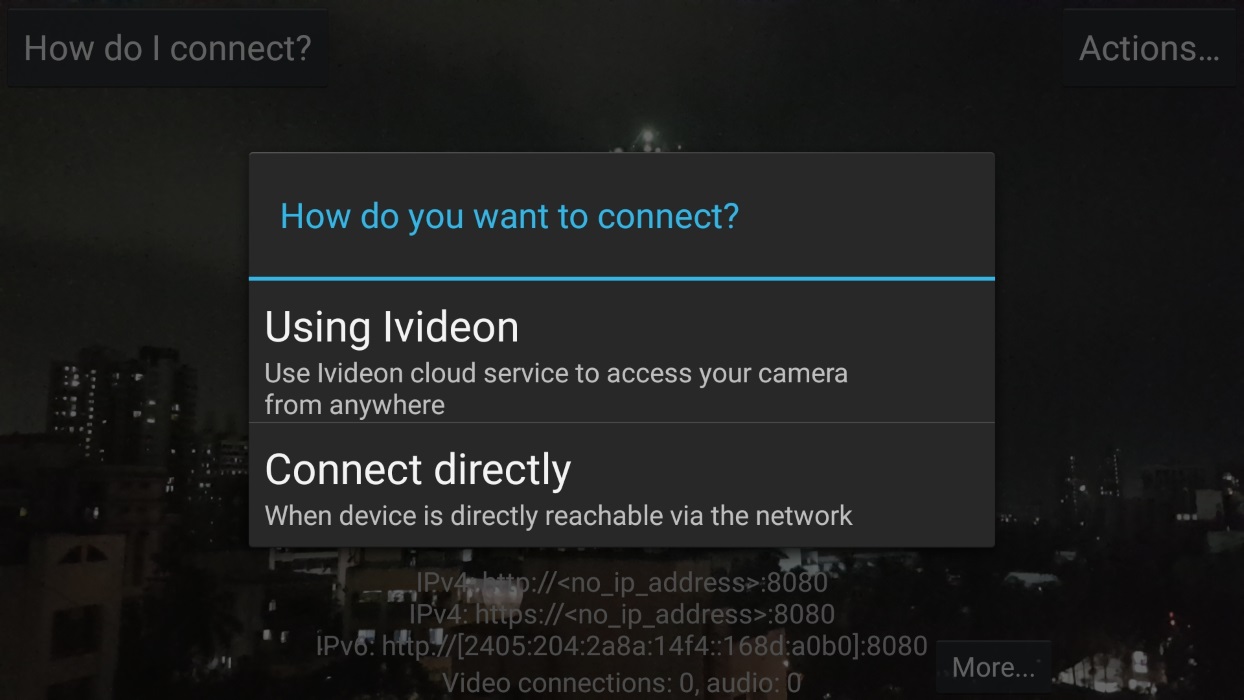
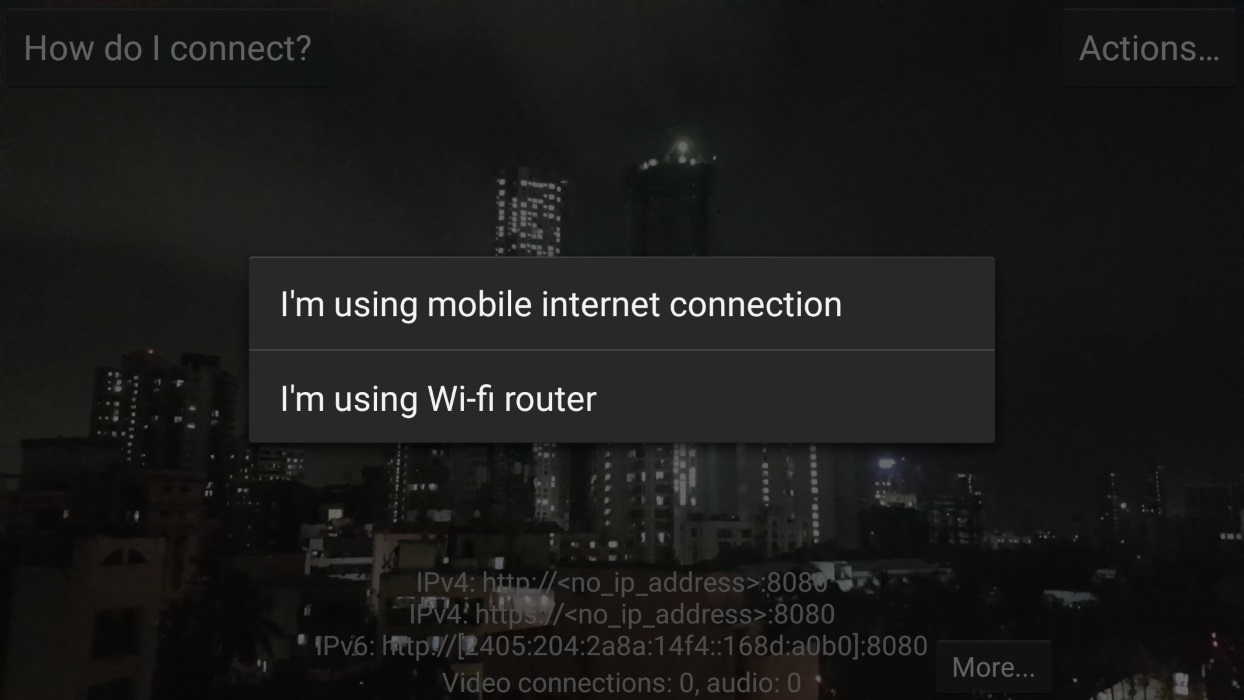
- Step 6: Click the “How do i connect?” button in the upper left corner and select “Connect directly” if your phone and computer are connected to the same network and choose “I’m using Wi-fi router” in the subsequent screen to get the IP address and port. You will get something like “http://192.168.1.203:8080“. Just note it down because you will work with it in the next steps.
- Step 7: Now go to the web browser of your computer. Then enter the IP address that you noted in the previous step and press Enter.
- Step 8: It’ll take you to the next screen where you can see your camera. On this page, select “Browser” in the “Video Renderer” section with “HTML5 Wav” in the “Audio Player” section.
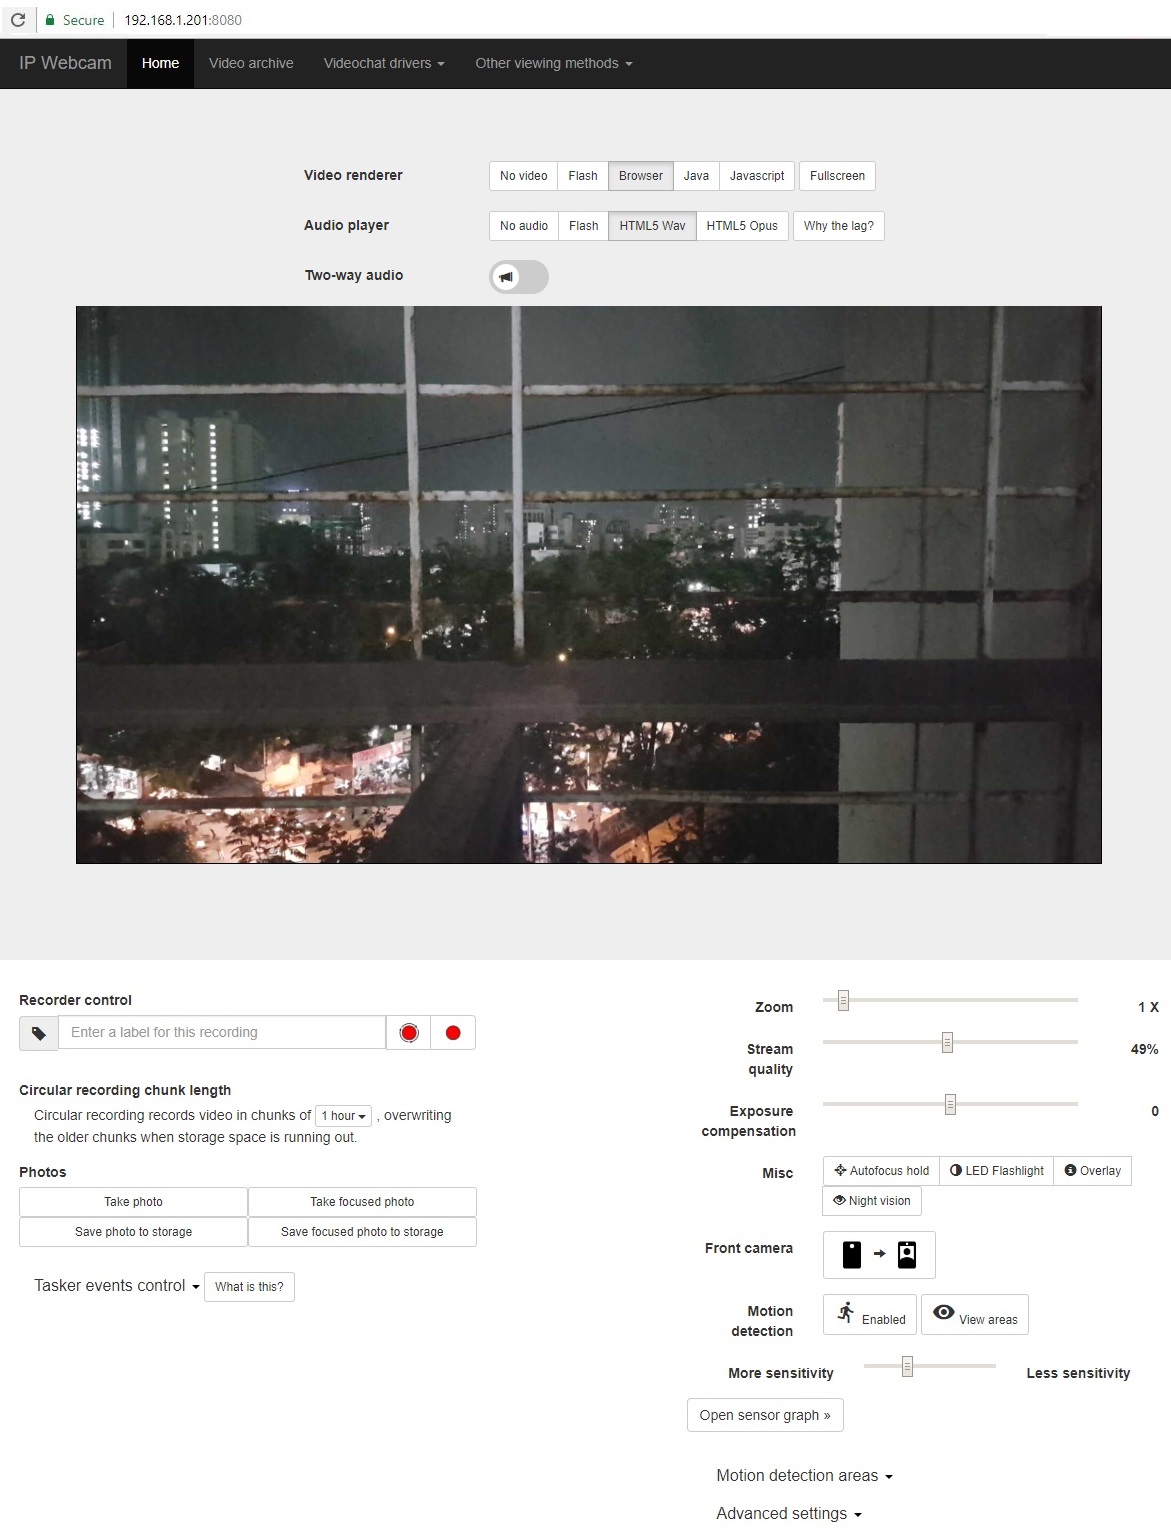
- Step 9: Make sure you can see your camera sequences directly in your web browser. That’s all, everything is ready.
Your phone is now working as a webcam and transmitting video to your computer screen. You can also see different options like setting stream quality, take photo, save the recording to storage and more.
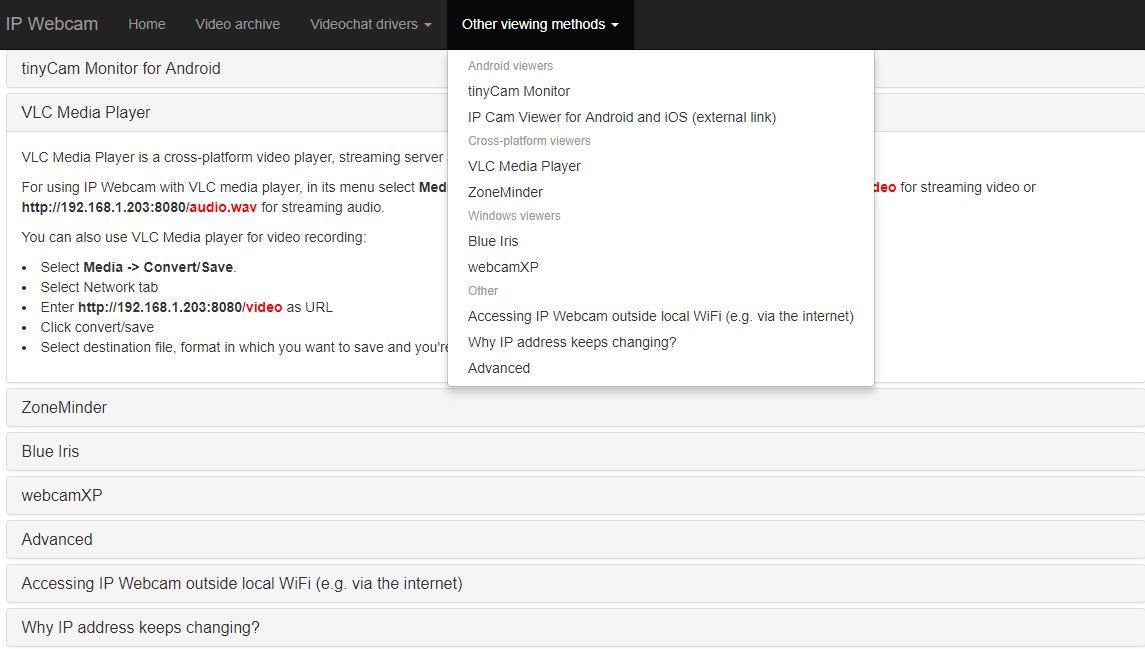
On the top right menu, there is an option to select other viewing channels. From here you can choose your viewing methods to work with other applications such as tinyCam Monitor for Android, IPCan Viewer for Android & iOS and other IP camera online viewers. You can even stream to your favorite cross-platform VLC Media Player!
Features of IP Webcam
IP Webcam comes with a plethora of features such as:
- Video upload to Dropbox, SFTP, FTP and Email using Filoader plugin
- Several web renderers to choose from: Flash, Javascript or built-in
- Video recording in WebM, MOV, MKV or MPEG4 (on Android 4.1+)
- Audio streaming in wav, opus and AAC (AAC requires Android 4.1+)
- Motion detection with sound trigger, Tasker integration.
- Date, time and battery level video overlay.
- Sensor data acquisition with online web graphing.
- Videochat support (video stream only for Windows and Linux via an universal MJPEG video streaming driver)
- Cloud push notifications on motion and sound, cloud recording for motion-triggered records, online video broadcasting powered by Ivideon.
- Extensive baby and pet monitor features: night vision, motion detection, sound detection.
Wrap Up
The IP webcam is a great solution if you do not have a remote webcam camera. It is available for free on Google play and other application market platforms. IP Webcam allows you to use your Android phone as a wireless network camera that can be viewed remotely.