Amongst man’s greatest inventions are aircraft, satellites, sophisticated engineering equipment, heavy machinery to mention but a few. All these affect our lives in one way or the other. However, these mighty machines have blinded our eyes from invaluable simple inventions that directly affects our daily activities. This cheap DIY project guide aims at showing you how to generate power from the convenience of your home and utilize it without fear of accumulating electricity bills.
Sunlight is one of nature’s greatest gifts to us, a resource that can be harnessed to ease some of life’s complex processes such as power generation. It can be channeled into a handy tech first aid in emergency situations and a gold mine if you add a little creativity to it. This article will teach you how to develop solar powered chargers at home in very simple and demonstrative steps you can never miss.
What are solar power chargers?
Solar power chargers are quick and affordable means of generating and storing sufficient amount of power to either bring your devices back to life or keep them going for as long as you want. A Portable solar charger potentially becomes your best friend when the need arises to power a phone or rechargeable devices in a deserted area or when stranded in the middle of nowhere. It works on the principle of converting the much readily available sunlight (heat) into electricity using solar receptors (solar panels).These chargers can be built to be very easy to handle, and require minimum maintenance.
How do you make solar power chargers?
You don’t have to bag a degree in engineering to put this together. All there is to do is take your time to carefully read this article and follow the simple steps and guides provided. Images have been provided to help demonstrate better.
What do you require?
Here is a list of all the supplies you will need to execute this project, you can pick them up from local stores or order online at a very low price.
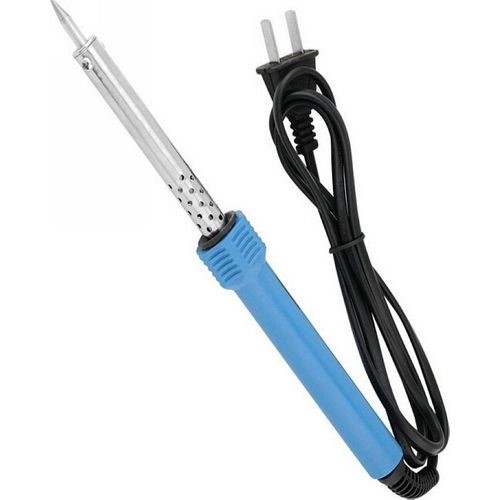
- Soldering iron (25-Watt): This is a simple hand tool used for soldering. It supplies the heat required to melt solder. It has an insulated handle usually made of wood or rubber.
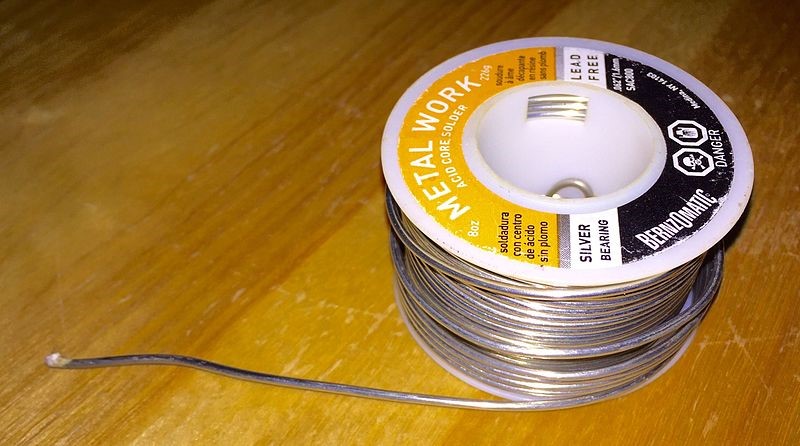
- Solder: A solder is a fusible metal alloy that is used to provide a permanent bond between pieces of metal work. The solder has to be melted by heat using a soldering iron to join pieces together.
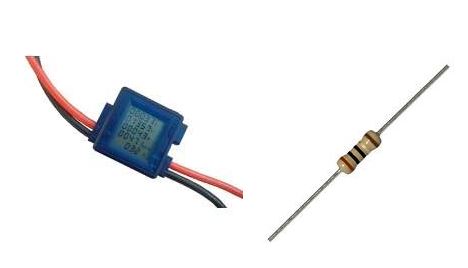
- Blocking Diode: A diode makes use of a semiconductor material, mostly silicon, and comes with two terminals. It allows current to flow in a single direction and not vice versa thus preventing negative charging or backflow of current when the power source (sun) is removed.
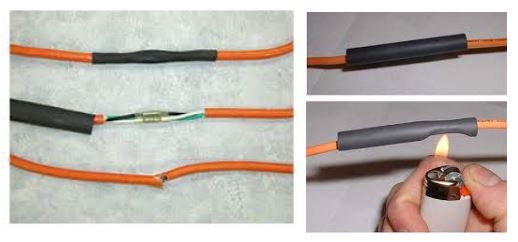
- Heat shrink: you need this to seal the wire joint and prevent exposure of naked wires. You need a source of heat to put this around your wires.
- Zener diode: this is commonly known as volt regulator. It prevents current from going above certain levels in order eliminate the possibility of a power In this case, you will need a 5.1V Zener diode to keep the current in the circuit below 5 volts, 500mA.
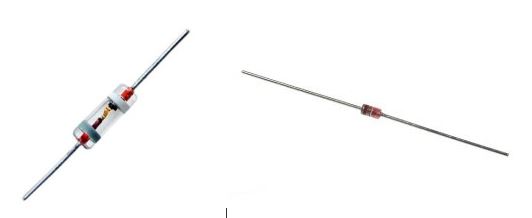
*the end marked with a black stripe is the cathode (-); this is the terminal corresponding to your black wire while the other end is the anode (+) corresponding to your red wire.
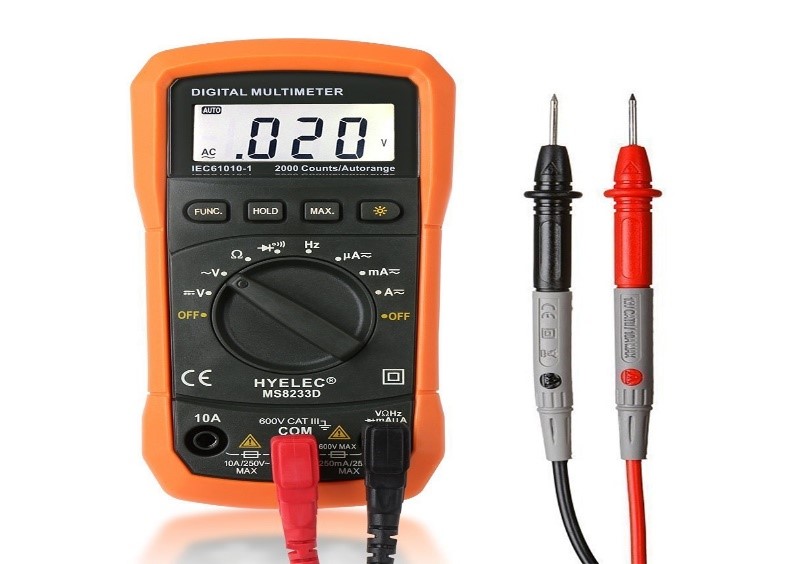
- Multimeter: this electronic device can give you readings of both voltage and current. It saves you the cost of having to purchase an ammeter for measuring current and a voltmeter for measuring voltage in your circuit. It’s like a two-in-one thing, and the digital Multimeter is preferable.
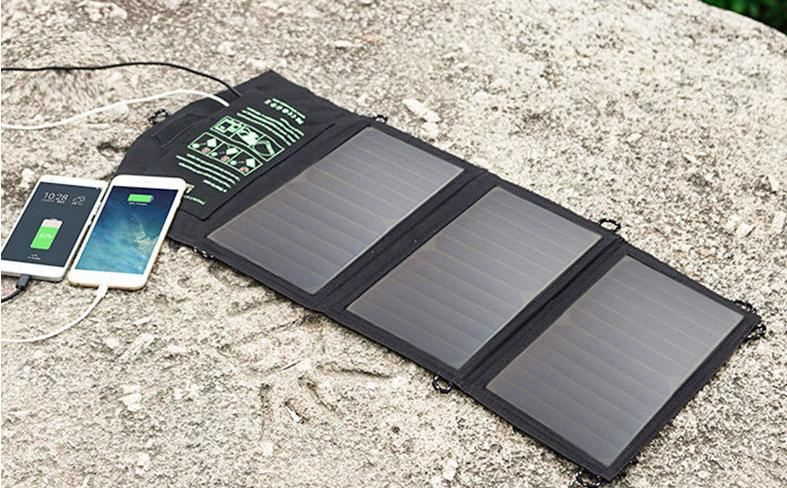
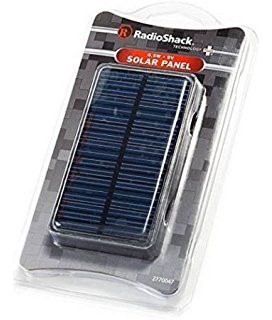
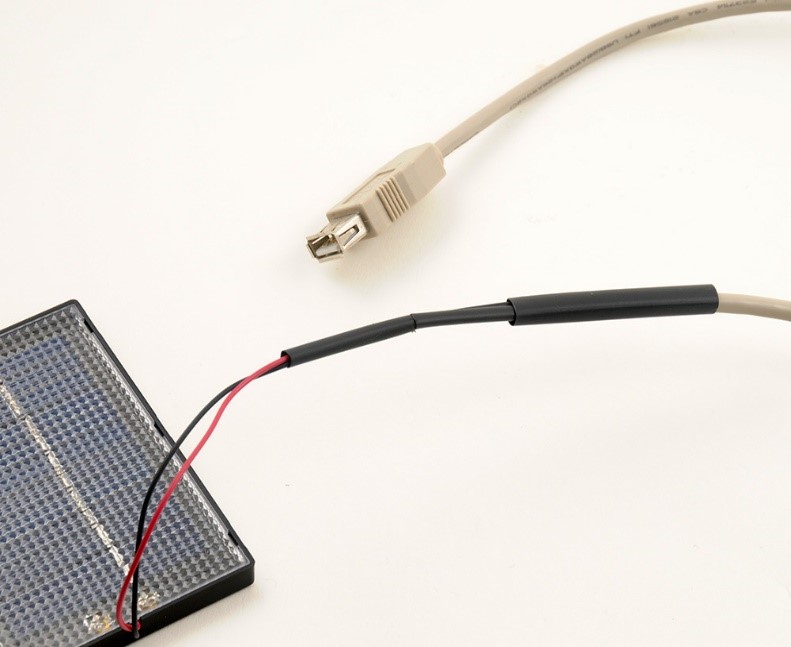
- Portable Solar panel/cell: Solar panels are also called absorbers, they absorb sunlight as a source of energy and convert the solar energy (radiation) to electricity. You will need a 6V, 100mA solar panel for your charger since this can power most USB devices.
*Also take note of the terminals.
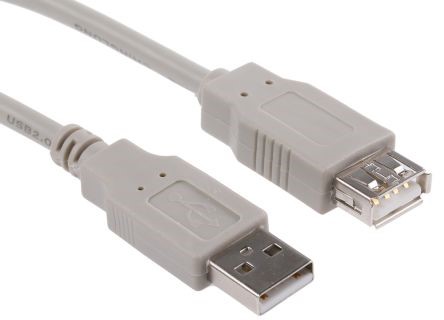
- Female USB cable: This enables you to connect your device to the solar charger.
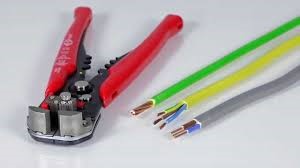
- Wire stripper: This is a small, simple hand-held tool you can use to remove or strip the protective electrical insulation covering from electric cables/wires.
STEP 1
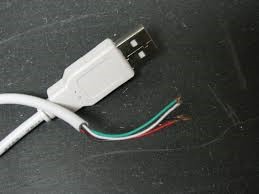
Cut off the end of the end of the USB cable that usually connects to your computer or electric socket; you can use a pair of scissors for this. Then gently use your wire stripper to expose the positive wire (mostly red in color) and negative wire (mostly black or white in color) by gently removing the wire insulation.
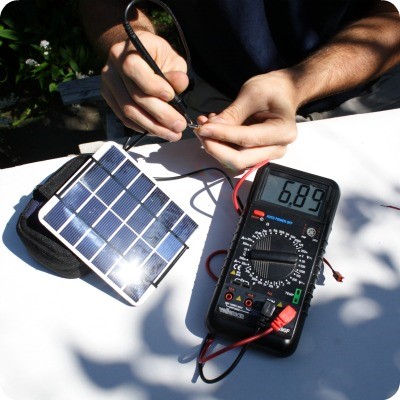
- Use your Multimeter to probe the capacity of your solar panel ensuring that the output is approximately 6V (100mA).you can do this by simply touching the terminals from the Multimeter to the corresponding terminals on the solar panel.
STEP 2
- Solder the black wire from your solar panel directly to the black wire from your female USB connector.
- Solder the blocking diode between the red wire from the solar panel and the red wire from the USB connector.
- Next, solder the Zener diode or volt regulator across the connections with the striped end of the Zener diode corresponding to the black wires and the other to the red wires.
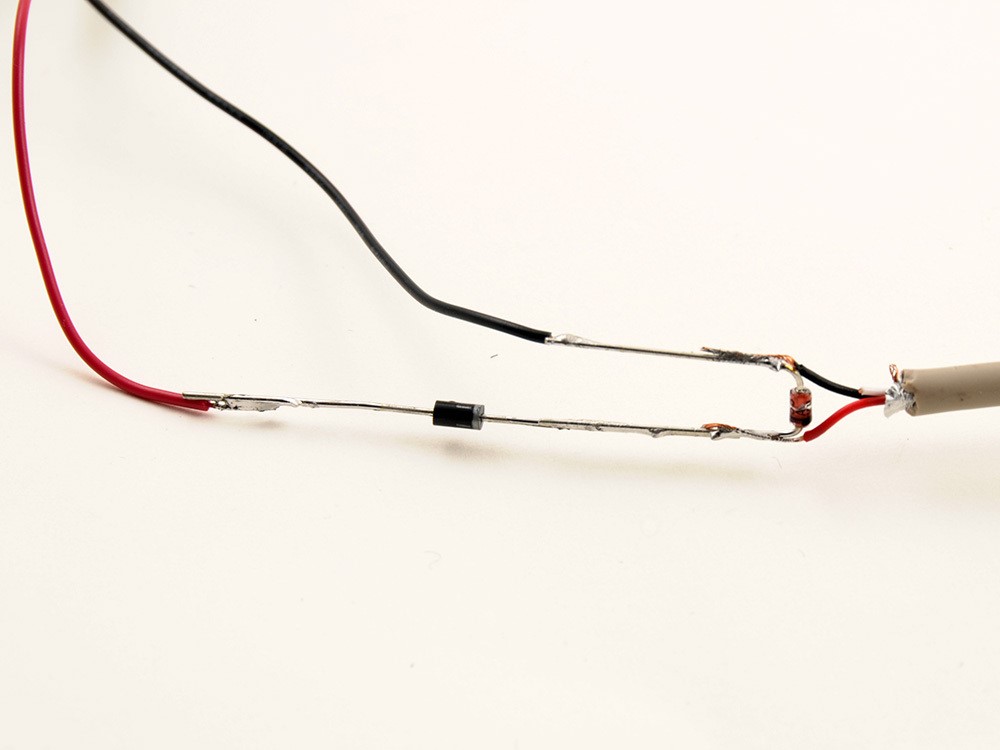
- Lastly, place the heat-shrink tubing over the joints for insulation and melt it on with heat.you can use a heat gun, a candle flame or lighter for this.
STEP 3
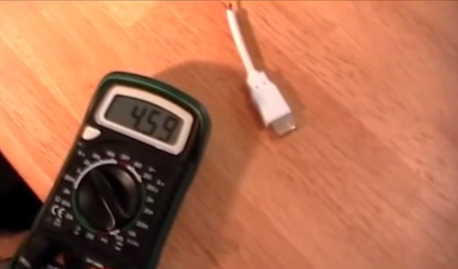
This step tests the output of your solar charger. Get a new USB cable and chop off the end that goes into your device to expose the red and black cables at this end. Fuse the other end of the chopped USB to the female connector on your charger. Now measure the output voltage by bringing the red and black cables in contact with the corresponding Multimeter terminals.
If you got your connections correctly, the Multimeter should read between 4-5V which is required by most USB devices depending on the intensity of the sun. It doesn’t go far beyond 5 volts due to the regulatory effects of the Zener diode.
Once the output has been is tested, connect your device and never again run out of power when the sun is up.
This is a brief and easy DIY project, the supplies are locally available, and the major component, sunlight, you get for free. Why not give it a try then?