If you ever wanted to use your smartphone to watch a movie with a gang of friends or make a presentation directly from it and couldn’t do so since projectors cost a bomb, then do try this extremely simple DIY using simple things which are usually lying around your house.
Although there are attachments available that will transform your smartphone into a projector, they are priced high. The following DIY projector is comparatively cheaper since it can be built in less than two dollars!
Supplies Required
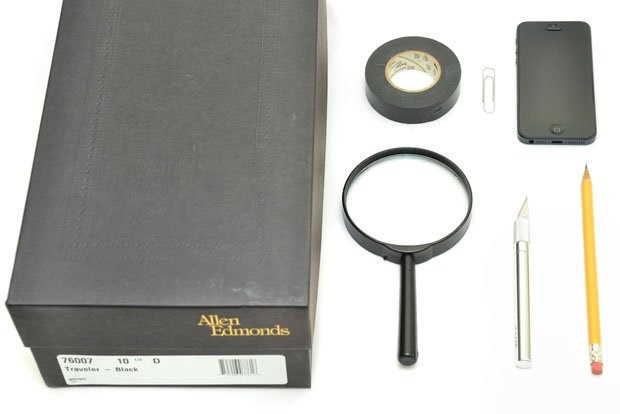
Supplies required for this DIY are extremely simple!
- You only require a shoe box or a rectangular box which is black in color
- Black paper or spray paint
- Magnifying glass or large sized lens
- Paperclip
- Smartphone
- Electrical Black Tape
- Knife to Cut
Getting Started
Making this DIY projector is as easy as a breeze! Follow the simple steps listed as follows:-
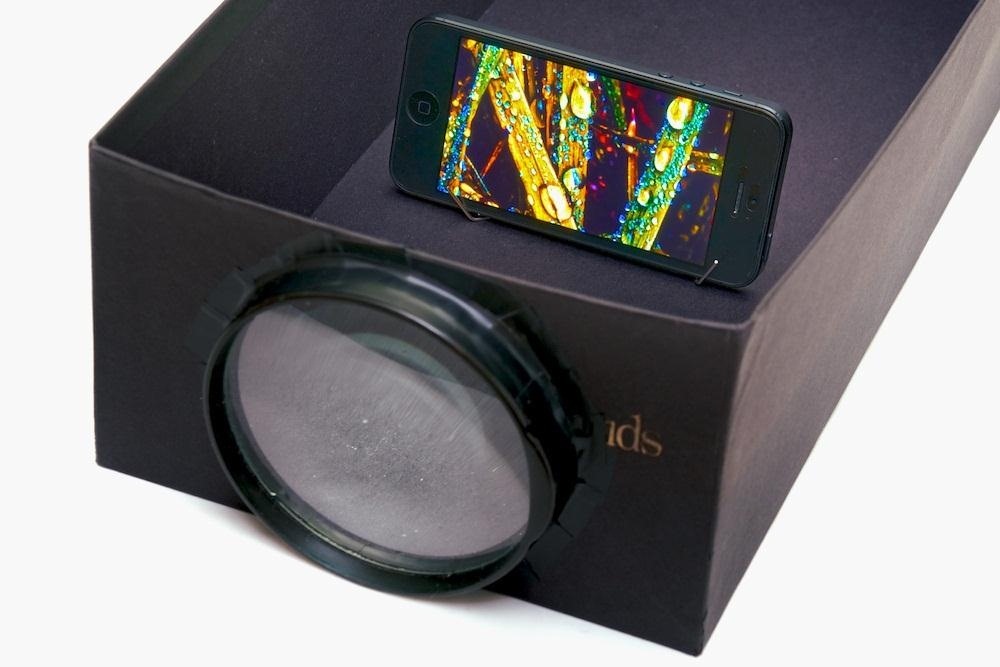
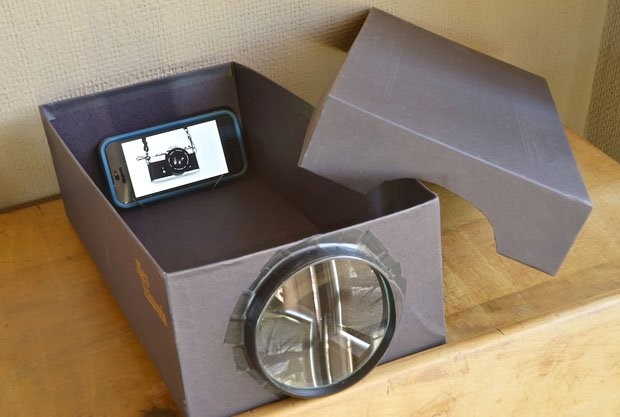
- Step 1: Take a shoe box and remove any dust or impurities inside the box. If the inside of the box is any other color apart from black, then you will need to spray its inside with black spray paint and black paper so that it does not deviate any light. Once done, remove the lid of the box and make a circle on the front portion by tracing the magnifying glass or lens on it.
- Step 2: After you have traced the circle, cut around it and fix the magnifying glass around the projector box. Make sure that both of them fit perfectly or light will escape if the hole of the projector is too big. You will also have to punch a small hole at the back portion of the projector so that the Smartphone’s charger cord can pass through.
- Step 3: Make a stand for the phone using a paperclip by opening it and bending it as depicted in the picture.
- Step 4: Attach the lens to the box with the help of some black tape. Make sure you secure it properly so that it doesn’t fall out or light doesn’t pass through any open spaces. In case of a magnifying glass, you will have to remove the handle first.
- Step 5: When the phone of your light will pass through the lens of the projector, the image appears upside down. To fix this, use the rotate screen mode of your smartphone to revolve the image right side up. For Android phones, one can download the Ultimate Rotation Control app.
- Step 6: Set the focus of the projector by using it on white or light colored wall. You can also use a white sheet if your wall is brightly colored. Place the smartphone on the stand right in the center of the cardboard box or towards the end of the box and adjust it to make picture clear.
- Step 7: Increase the Brightness of your phone device to maximum when you start using the projector!
Finally, turn the lights down and enjoy this DIY projector!