Want to record calls on your Samsung Galaxy Note 20 or Note 20 Ultra? The call recording feature on your Galaxy Note 20 or Note 20 Ultra allows you to record your call conversations and playback later.
In this article, we’ll explain how to record calls on your Samsung Galaxy Note 20 or Note 20 Ultra. Read on.
Important Note:
- The feature may or may not be available in certain regions depending on whether the local laws allows it or not.
- The call recording feature may not be available when the VoWiFi (Voice over Wi-Fi) feature is activated. So make sure the same is disabled before proceeding.
There are two ways to record calls on your Note 20. You can choose to record on a call by call basis or choose to record calls automatically. We will discuss both methods one by one.
See Also: [How-to] Enable Galaxy S23 Auto Call Recording
Recording calls manually
Follow the steps below if you choose to record each call individually.
Step 1: Open the Phone app
Step 2: Make a call to a number that you wish to record
Step 3: Next click the 3 vertical dots menu on the right
Step 4: Then click the Record button
Step 5: Click Confirm to Terms and Conditions. Your call recording will start and saved in the phone’s internal storage after the call has ended.
You can view the recorded calls by going to My Files > Internal Storage > Call folder.
You can also view the call recordings through the Phone app.
- Open Phone app
- Click the 3-dot menu button on the top-right corner
- Click Settings
- Tap on Recording calls
- Click on Recorded Calls
Here, you will see the list of all the recorded calls.
Recording calls automatically
You can also enable automatic call recording if you don’t want to follow the above steps for each call you want to record. Follow below steps to enable automatic call recording on your Note 20.
Step 1: Open the Phone app
Step 2: Then click the 3-dot menu on the top right corner
Step 3: Next tap on Settings
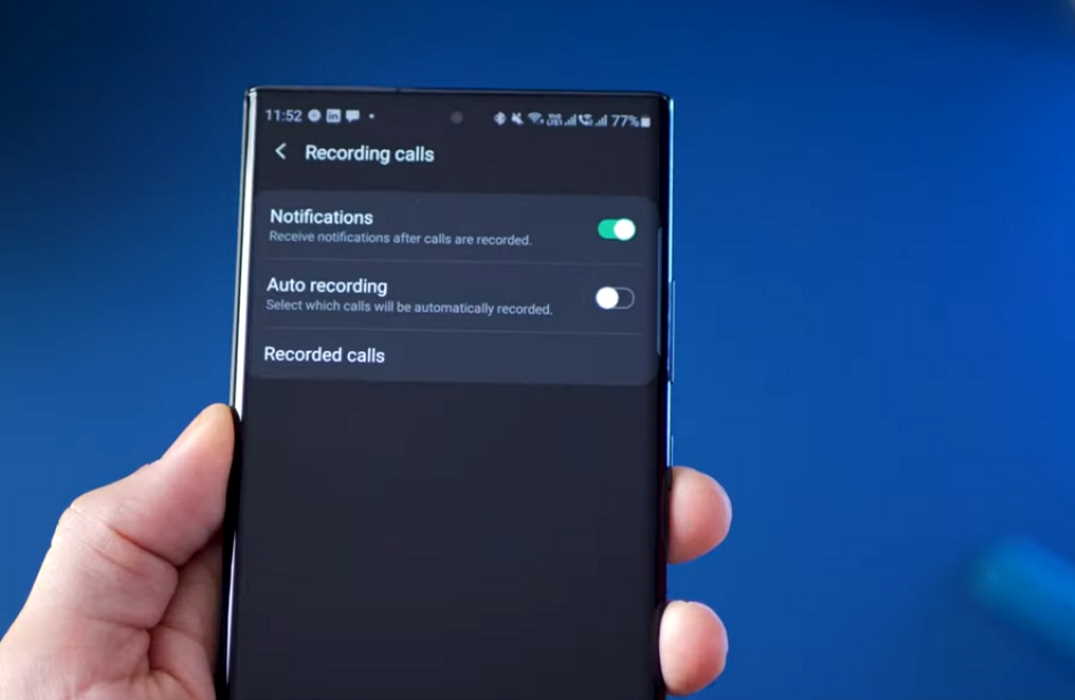
Step 4: Now tap on Recording calls
Step 5: Finally, tap on Auto Recording and toggle the switch to enable automatic call recording.
You can choose your auto call recording preference by tapping the Auto recording option and setting the recording option. You can choose from the following options.
- All numbers: Record calls for all numbers
- Unsaved numbers: Record only calls for unsaved numbers
- Selected numbers: Record calls for selected numbers
To view the recordings, go to My Files > Internal Storage > Call folder. You can also access your call recordings through the Phone app.
- Open the Phone app
- Click the 3-dot menu button on the top-right corner
- Next click Settings
- Then tap on Recording calls
- Now tap on Recorded Calls to see your recordings.
Wrapping up
Before you start recording calls, you should first check if its legal in your state. While federal law permits recording telephone calls and in-person conversations with the consent of at least one of the parties (e.g., you), these laws can vary from state to state. It is also advisable to get permission from the other person(s) before you can start recording so you don’t face any legal problems later.