Every good thing comes to an end, but that doesn’t have to be true with your old or damaged laptop. Yes, your laptop is dead, but you can still salvage some vital components, the LCD screen is a good place to start. Not all of us are good with tools, but it shouldn’t be too great a challenge to successfully take out your old laptop screen in a few steps. All you have to do is take out the front bezel by loosening the screws and removing snaps. What’s a bezel? That question probably crossed your mind. The bezel is the plastic frame work in front of the screen; We will try to keep this nice and simple by defining such strange terms. Once the bezel is off, you need to take carefully take off the laptop screen by unscrewing the bracket screws (screws beside the screen) and taking off the video connector cable and inverter.
The inverter converts direct current coming from the motherboard into alternating current and then passes it onto the LCD screen. It is located at the base of the screen and has cables of its own, take them off one after the other, and then your LCD screen is free to be taken out. There is a bold “DO NOT TOUCH” warning on the seal protecting the screen’s circuit board, and you have to obey it STRICTLY.
The steps involved in taking out your laptop screens varies for different products, while most are as easy as described above, others might require you to take open up your laptop completely.If you are finding this difficult, I advise you DDIY (don’t do it yourself ) and get a technician to help take your screen out, so you don’t end up damaging the screen, motherboard or other components that could be useful for other projects.
Now to the business end of this DIY project. I am assuming you now have your LCD screen. All you need now is an easy DIY guide to lead you through converting it to an external display unit for your computer, game consoles and other devices.
Step 1: Do some shopping
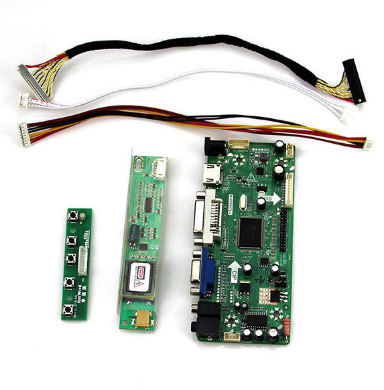
The removed LCD cannot function as an external monitor alone. You have to get a matching controller/driver board. This device contains dials, switches, and meters and directs the signal from your computer or game console to the LCD screen. The controller must be compatible with your LCD screen so check your screen model number on the label behind it and search online for a matching controller board online. Before placing your order, ensure you contact the sellers, provide them your model number to help them get you the right controller board for your LCD screen. LCD controllers are all over Amazon, ebay and other online stores like aliexpress and DHgate. You can get one for as low as $16. Just in case it proves difficult to get a controller board for your LCD screen, I suggest you get a universal controller board though some of these come with just a VGA port with no room for HDMI cables.
The package you will receive should contain the main controller board, a keyboard, and an inverter. The keyboard is a smaller board with five or more keys on it and serves as a remote control for your monitor. The keyboard enables you to adjust the monitor’s volume, brightness, contrast and a lot of other properties.
You will also get three cables, the LVDS cable which connects the controller board to the LCD screen, the keyboard cable and the inverter cable.
Step 2: Connecting the Cables
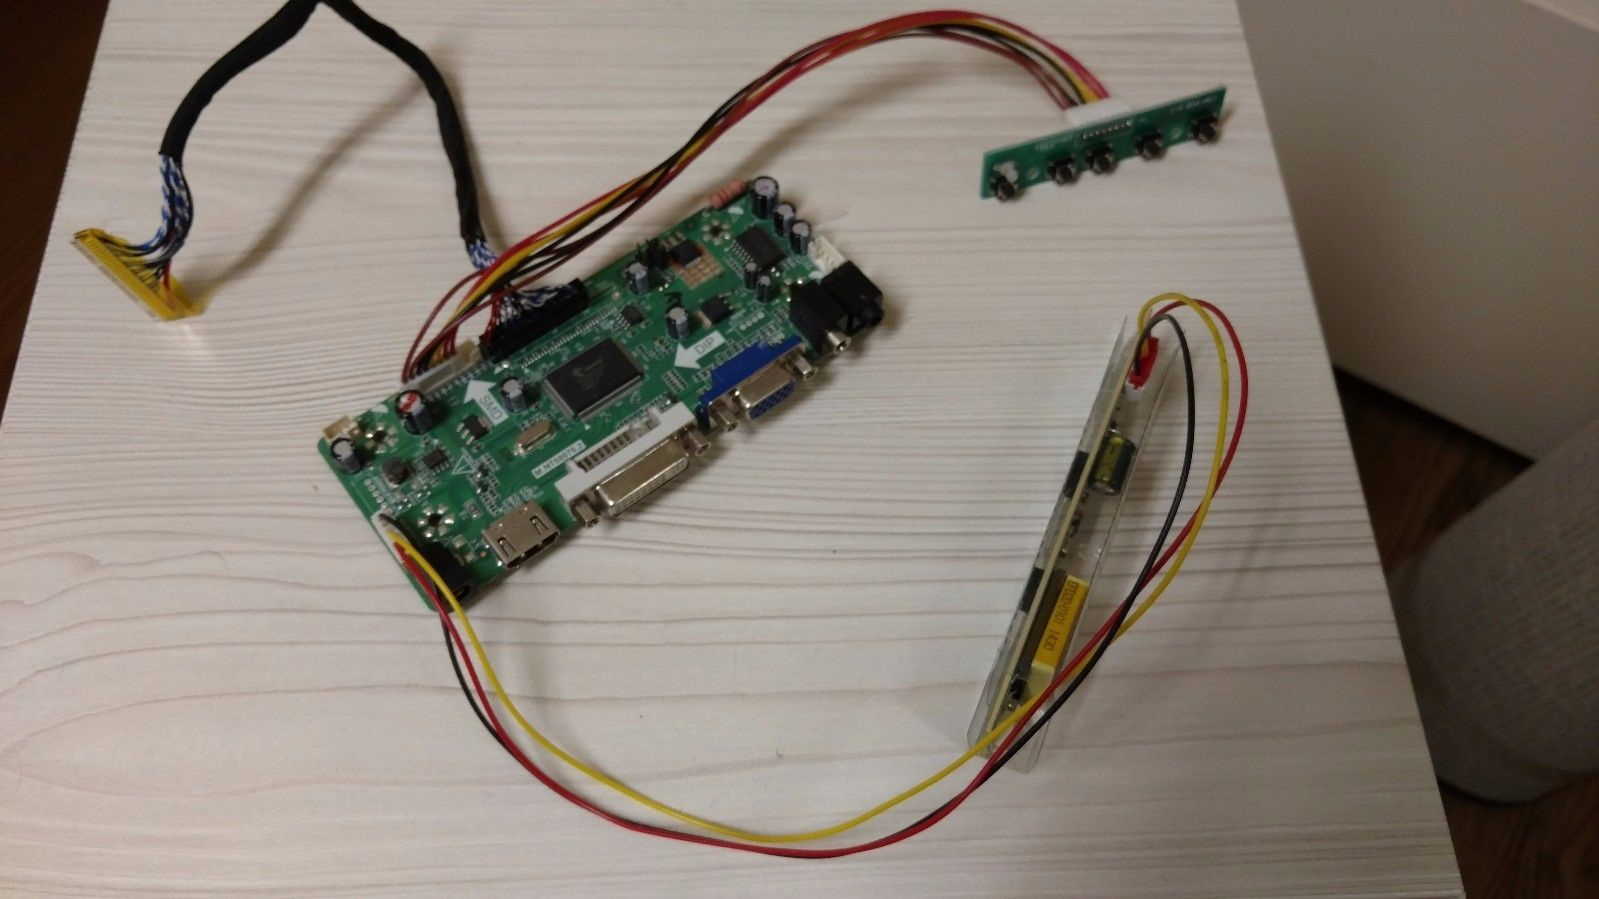
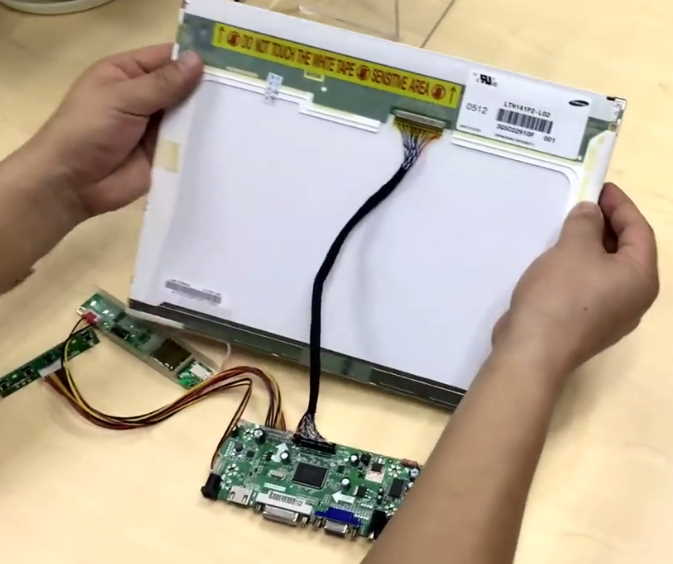
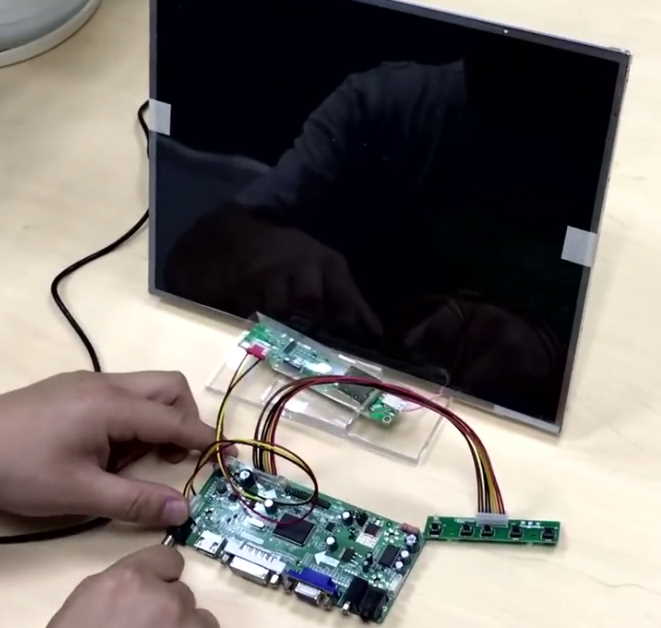
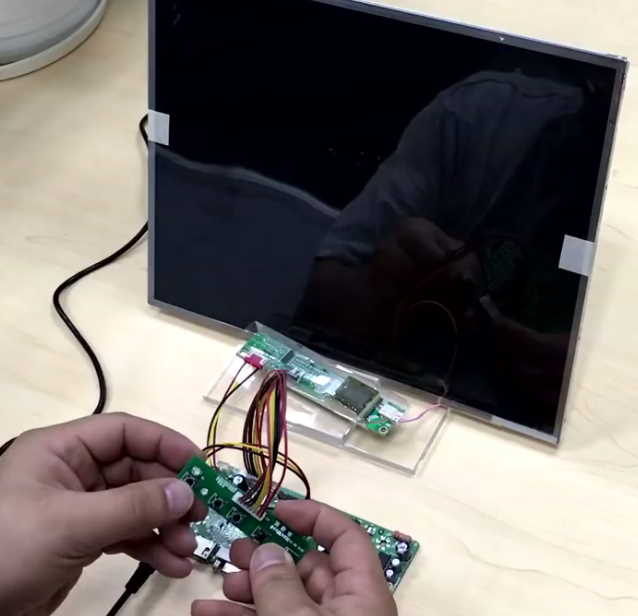
This step should be brief and easy. I prefer to connect the smaller components before linking the whole unit to the LCD panel using the LVDS cable. As mentioned earlier, there are three cables in total, and it’s quite obvious where each one goes.
First, connect the keyboard to the controller board using its cable. Next, connect the inverter to the controller panel and then connect the inverter to the screen’s backlit connector. Finally, link the controller board with the LCD panel using the LVDS cable. Remember NOT to touch the screen circuit while you connect this to the screen. Make sure the pins are correctly oriented; conventionally they should face down. The cable goes in easily and comes off easily as well. It is advisable to tape it in place so as not to strain the fragile screen circuit.
Step 3: Powering up your Monitor
The appropriate adapter for this project is one with an output of 12 volts, 4 Amperes. This is very important. Most adapters would fit into the power port on your controller board so don’t be tempted to power on your monitor using just any adapter you lay your hands on; you would most probably end up ruining the controller board or LCD screen you are trying to salvage. The output voltage and current are always clearly indicated on the adapter’s label. Adapters do not cost much and are very easy to get. Some stores send free adapters with the controller panel.
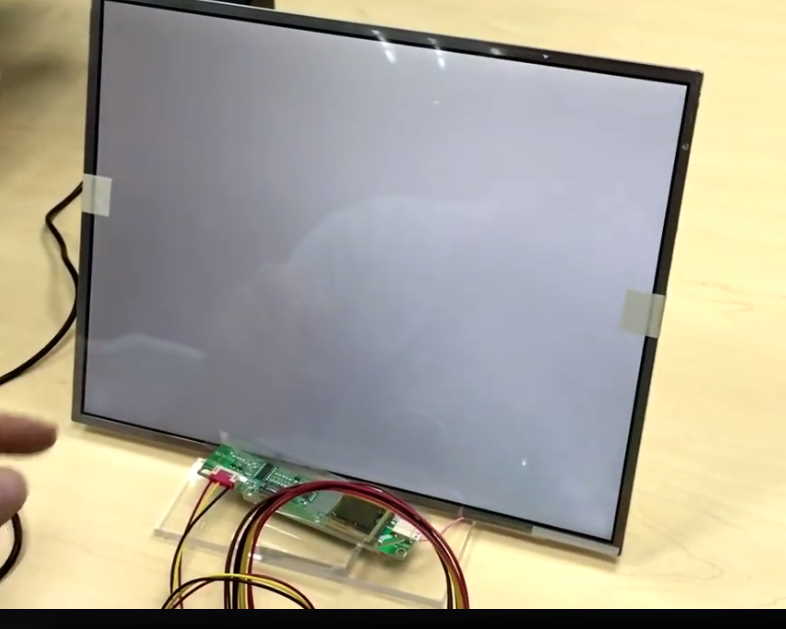
Don’t be in a hurry to put on your monitor double check your connections, once sure everything is in place, bring your monitor to life by switching on the power button.
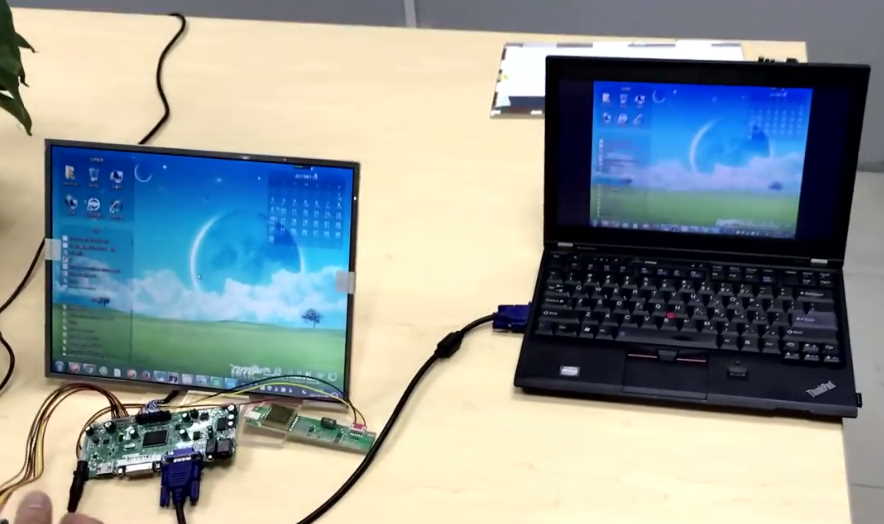
Step 4: Putting your Monitor to Use
Monitors display signals coming from other components and your improvised monitor is no different. You will need different cables to connect your monitor to game consoles, PC, and other devices. These include HDMI, VGA, and DVI cables.
Each cable go into different ports on the controller board.
There is also an audio out port on the controller board to connect your new monitor to audio output devices such as speakers and amplifiers.
Once your device is connected, the pictures should come up on your monitor if you have followed the preceding steps correctly and your LCD screen is without faults.

This project is particularly awesome because not only does it drives you to tap into your creative side, it equally serves as a sort of recycling or repurposing of damaged laptops.